World Cuisine
Carnitas: Crispy, Tender Mexican Pork That'll Change Your Life
Learn to make authentic carnitas with this easy recipe. Slow-cooked pork shoulder gets impossibly tender and crispy. Perfect for tacos!
What Are Carnitas, Really?
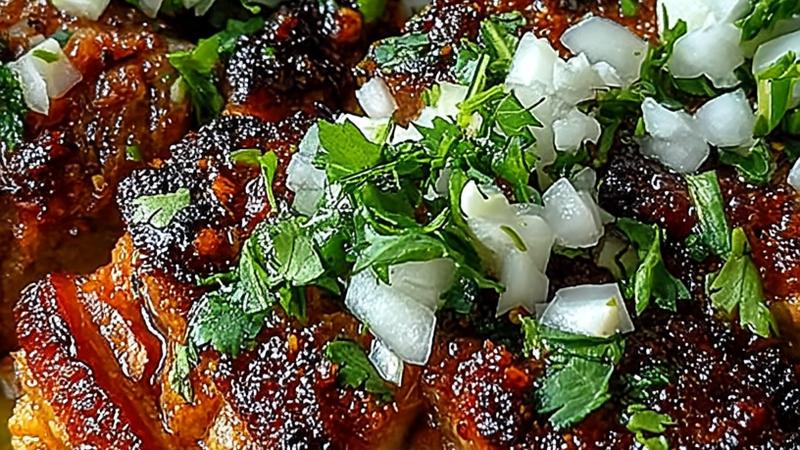
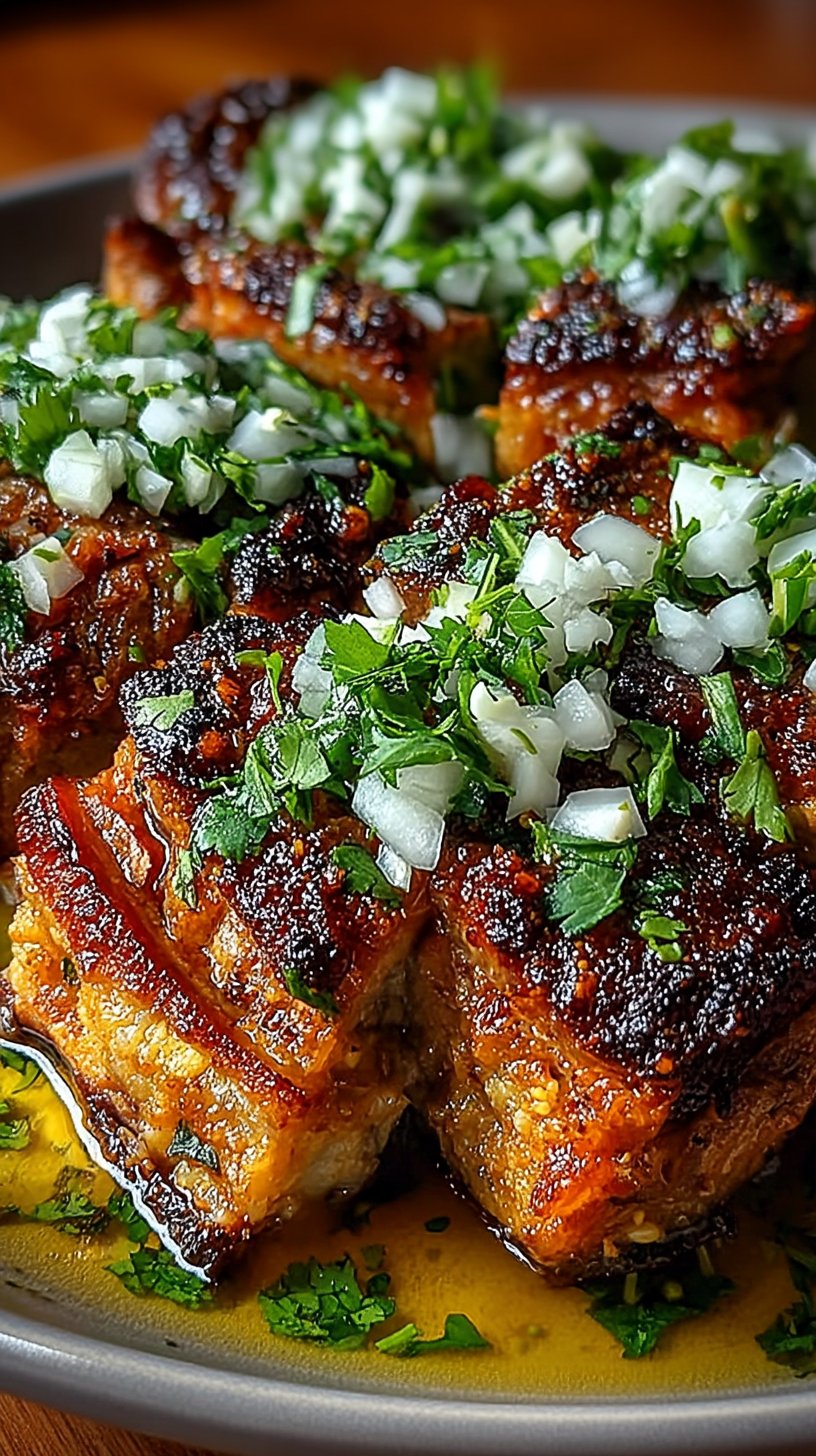
When I first discovered authentic carnitas during my travels through Michoacán, Mexico, I was absolutely captivated. Carnitas literally means “little meats” in Spanish, and it’s one of Mexico’s most beloved pork preparations. Unlike what you might find at some restaurants, true carnitas aren’t fried—they’re slowly braised in their own fat until they become impossibly tender, then crisped to perfection.
The magic of carnitas lies in the balance between two textures: an exterior that’s crispy and golden, and an interior that’s so tender it practically melts on your tongue. It’s a technique that dates back centuries in Mexico, originally a way to preserve pork before refrigeration. The meat cooked in fat would stay good for weeks, making it practical for rural communities. Today, it’s celebrated as a culinary art form.
What I love most about carnitas is their versatility. They’re equally at home in a simple taco with just onion and cilantro, or as the star of a more elaborate dish. I’ve served them at casual weeknight dinners and fancy gatherings, and they never fail to impress. The deep, savory flavor that develops during the slow cooking process is something you just can’t rush—and honestly, I wouldn’t want to!
The Science Behind Perfectly Tender Carnitas
Understanding the cooking process helped me nail my carnitas technique. When you cook pork at a low temperature submerged in fat, several magical things happen. First, the collagen in the meat slowly breaks down into gelatin, transforming tough connective tissue into something silky and delicious. This is why slow cooking works so much better than high-heat methods for tougher cuts.
The fat serves multiple purposes beyond just being a cooking medium. It conducts heat evenly, prevents the exterior from drying out, and infuses the meat with incredible flavor. As the fat heats, it breaks down the muscle fibers, and the rendered fat penetrates the meat, making it extraordinarily moist and tender.
Then comes the finishing step—the high-heat crisping phase. This is where you develop those gorgeous golden edges through a process called the Maillard reaction, which creates hundreds of new flavor compounds. It’s the difference between a good carnita and an absolutely transcendent one. The contrast between the crispy exterior and tender interior is what makes this dish so special.
Ingredient Substitutions and Variations
I’m always experimenting with my carnitas recipe, and I’ve discovered several variations that work beautifully. One of my favorite tweaks is adding orange zest and orange juice (about ¼ cup) along with the lime juice for a brighter, citrusy note. Another time I added a splash of apple cider vinegar for additional depth and complexity.
For the spices, while my base recipe uses cumin and oregano, I sometimes add a pinch of cinnamon or a star anise pod for a more nuanced flavor profile. Some cooks add jalapeños or habaneros for heat—you can do the same by adding 1-2 whole peppers during cooking and removing them afterward. I’ve also experimented with different herbs like epazote, which is traditional in some regions of Mexico.
If you’re health-conscious, you can reduce the fat slightly, though I don’t recommend cutting it by more than half as the meat needs that fat to become properly tender. You might also try using pork butt with less visible fat marbling, but expect slightly drier results. Some home cooks have had success with a 50/50 blend of lard and broth instead of pure fat, which reduces the overall richness while maintaining tenderness.
Serving Suggestions and Flavor Pairings
The beauty of carnitas is how wonderfully they pair with both simple and complex accompaniments. Traditional serving involves warm corn tortillas with just cilantro, diced onion, and lime—and honestly, this is still my favorite way to enjoy them because it lets the pork’s flavor shine. However, I’ve found that carnitas play beautifully with various toppings and dishes.
For a more elaborate presentation, try serving carnitas on crispy fried tortilla chips with crema, cotija cheese, and jalapeños for an elevated nachos dish. They’re amazing in quesadillas alongside oaxaca or mozzarella cheese and caramelized onions. I’ve even done carnitas breakfast tacos with scrambled eggs and crispy potatoes—absolute heaven.
Beyond tacos, I love adding carnitas to salads with avocado, black beans, and a lime vinaigrette. They make an incredible topping for tortilla soup, adding richness and substance. Some of my friends have even used them in non-Mexican applications—I’ve seen carnitas tacos with Asian slaw, and I admit they were surprisingly delicious. The versatility is truly impressive.
For condiments, I always offer salsa verde, pico de gallo, and fresh lime wedges. A drizzle of Mexican crema or sour cream adds richness if desired. Pickled onions and jalapeños provide brightness and acidity to balance the pork’s richness. Fresh cilantro isn’t just a garnish—it’s essential, providing herbaceous notes that complement the deep, savory meat.
Why This Recipe Works Every Time
I’ve made carnitas dozens of times, and I’ve learned what separates good results from extraordinary ones. The key is patience and attention to detail at specific moments. First, don’t skip the initial searing step. That golden-brown crust isn’t just pretty—it creates flavor compounds that deepen during the long cooking process.
Second, maintain a consistent low temperature during the braise. If your heat is too high, the exterior will toughen before the interior becomes tender. Too low, and you’ll be waiting forever. I aim for a gentle, barely perceptible simmer.
Third, the uncovered finishing phase is non-negotiable. This is where carnitas transform from merely tender to spectacular. The evaporating liquid and exposed heat create that crispy exterior that makes them irresistible.
Finally, let the meat rest after cooking but before serving. This allows the muscle fibers to relax and reabsorb some of the rendered juices, making each bite more succulent. It’s a small step that makes a noticeable difference in texture. Following these principles has never failed me, and I’m confident they’ll work for you too.
Ingredients
Main Ingredients
For Serving
Instructions
Prepare Your Pork
Pat the pork shoulder cubes dry with paper towels—this is crucial for achieving that beautiful golden crust later. I always take my time here because moisture is the enemy of crispiness. Season generously with salt and black pepper on all sides. Let the meat sit at room temperature for about 15 minutes while you gather your other ingredients. This small step helps the seasoning penetrate the meat and ensures more even cooking throughout.
Sear the Pork
Heat your lard or vegetable oil in a large heavy-bottomed pot or Dutch oven over medium-high heat until it's shimmering and hot (around 350°F/175°C). Working in batches to avoid overcrowding, sear the pork cubes for 2-3 minutes per side until they develop a deep golden-brown crust. This Maillard reaction creates incredible flavor and texture. Don't be tempted to move the meat around too much—let it sit and caramelize. Transfer the seared pork to a plate and set aside.
Build the Flavor Base
In the same pot with the remaining fat, add your minced garlic, cumin seeds, and oregano. Toast these aromatics for about 1-2 minutes until fragrant, stirring constantly. This is when my kitchen smells absolutely magical—the spices bloom and release their essential oils, creating a deeply savory foundation. Add the lime juice to deglaze the pot, scraping up any browned bits from the bottom. These caramelized bits are pure flavor gold!
Slow Cook Low and Slow
Return the seared pork to the pot along with the bay leaves and red pepper flakes if using. The pork should be mostly submerged in the fat. Reduce the heat to low (around 275°F/135°C if using an oven, or maintain a gentle simmer on the stovetop) and cover with a lid, leaving it slightly ajar. Cook for 2.5 to 3 hours, stirring occasionally. The meat is ready when it's fork-tender and easily falls apart. You'll know it's perfect when a piece shreds at the lightest touch. The low heat renders all that beautiful pork fat, making the meat impossibly tender.
Crisp It Up
Once the pork is tender, increase the heat to medium or medium-high and remove the lid. Let the meat cook uncovered for another 20-30 minutes, stirring occasionally. You'll see the pork gradually transform from soft and stewy to gorgeously crispy on the edges while staying tender inside. This is the magic moment! The pork will develop mahogany-colored, crackling edges while the interior remains juicy. Taste and adjust seasoning as needed.
Drain and Rest
Using a slotted spoon, transfer the crispy carnitas to a paper towel-lined plate. Let them rest for 5 minutes—this helps them stay crispy rather than steaming. Reserve about 2-3 tablespoons of the cooking fat to drizzle back over the carnitas for serving if desired (this is traditional and adds incredible richness). Discard the remaining fat or save it for cooking other dishes—it's liquid gold for beans or eggs!
Serve and Enjoy
Warm your tortillas directly over a gas flame or in a dry skillet until they're soft and pliable. Fill each tortilla with a generous portion of crispy carnitas, then top with fresh cilantro, diced onion, and a squeeze of lime juice. Serve with salsa verde or pico de gallo on the side. I like to set out all the garnishes family-style so everyone can customize their perfect bite. These carnitas are also incredible on nachos, in quesadillas, or atop a crispy salad!
Nutrition Information
Per serving (serves 6). Values are approximate.
| Calories | 385 calories |
| Total Fat | 22g |
| Saturated Fat | 8g |
| Carbohydrates | 2g |
| Sugar | 0g |
| Protein | 42g |
| Sodium | 580mg |
| Fiber | 0g |
* Percent Daily Values are based on a 2,000 calorie diet. Your daily values may be higher or lower depending on your calorie needs. Nutritional information is an estimate and may vary.
Never Miss a Recipe
Join 5,000+ home cooks and get new recipes straight to your inbox.
Frequently Asked Questions
Can I make carnitas in a slow cooker or Instant Pot?
Absolutely! I've done this many times. For a slow cooker, combine all ingredients and cook on low for 6-7 hours until the pork is tender. For an Instant Pot, cook on high pressure for 45 minutes, then do a quick release. After cooking, transfer to a skillet and crisp up over medium-high heat for 15-20 minutes. The results are slightly different from the traditional method but still delicious.
What's the best cut of pork to use?
Pork shoulder (also called pork butt) is ideal because it has great marbling and fat content, which renders beautifully during the long, slow cooking. This fat is what makes carnitas so incredibly tender and flavorful. Avoid lean cuts like pork loin—they'll dry out during the extended cooking time.
Can I use butter or oil instead of lard?
While traditionally lard is used, you can substitute with vegetable oil, coconut oil, or even a combination of butter and oil. However, lard has a higher smoke point and contributes to that authentic flavor and texture. If using butter, monitor carefully as it can burn at high temperatures. Vegetable or canola oil works wonderfully as a neutral alternative.
How do I store leftover carnitas?
Store carnitas in an airtight container in the refrigerator for up to 4 days, or freeze for up to 3 months. They keep wonderfully because of the fat. To reheat, simply warm them in a skillet over medium heat until crispy again, or microwave if you're in a rush. The flavor actually deepens after a day or two!
Why aren't my carnitas crispy?
The most common reason is not cooking them long enough in the uncovered phase at higher heat. Make sure you give them at least 20-30 minutes uncovered at medium-high heat to develop that golden, crispy exterior. Also ensure your initial searing created a proper crust. If they're still not crispy enough, you can always pan-fry them in a separate skillet before serving.

Hi, I'm Lisa!
I create simple, tested recipes from around the world that anyone can make at home.
Learn More →Reader Reviews
Based on 292 reviews
Leave a Review
You Might Also Like
World Cuisine
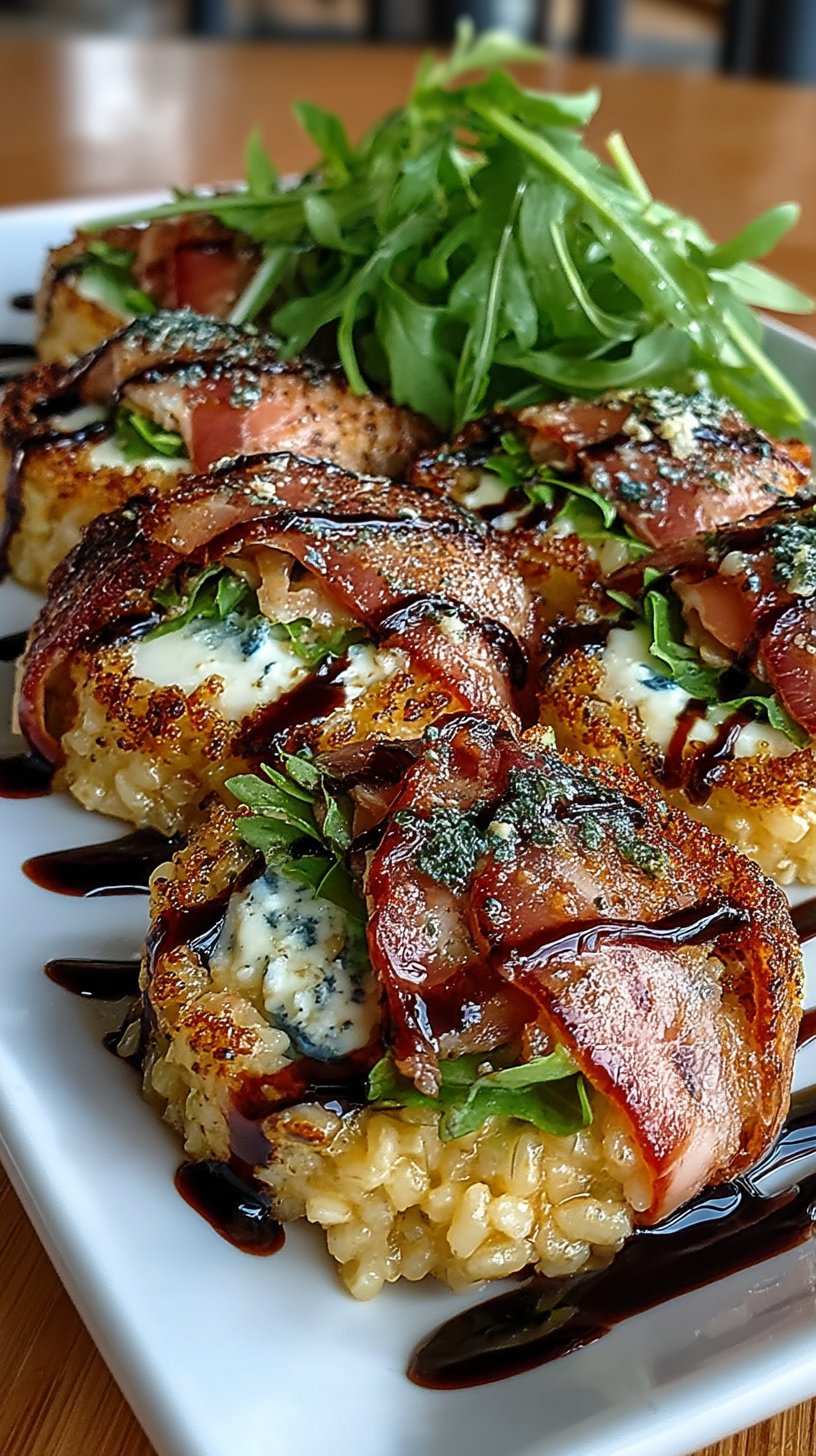
Yellow Curry Meatballs with Peanut Shallot Crispies
World Cuisine
I Can't Stop Eating This Lemony Greek Chickpea and Feta Cheese Salad
World Cuisine
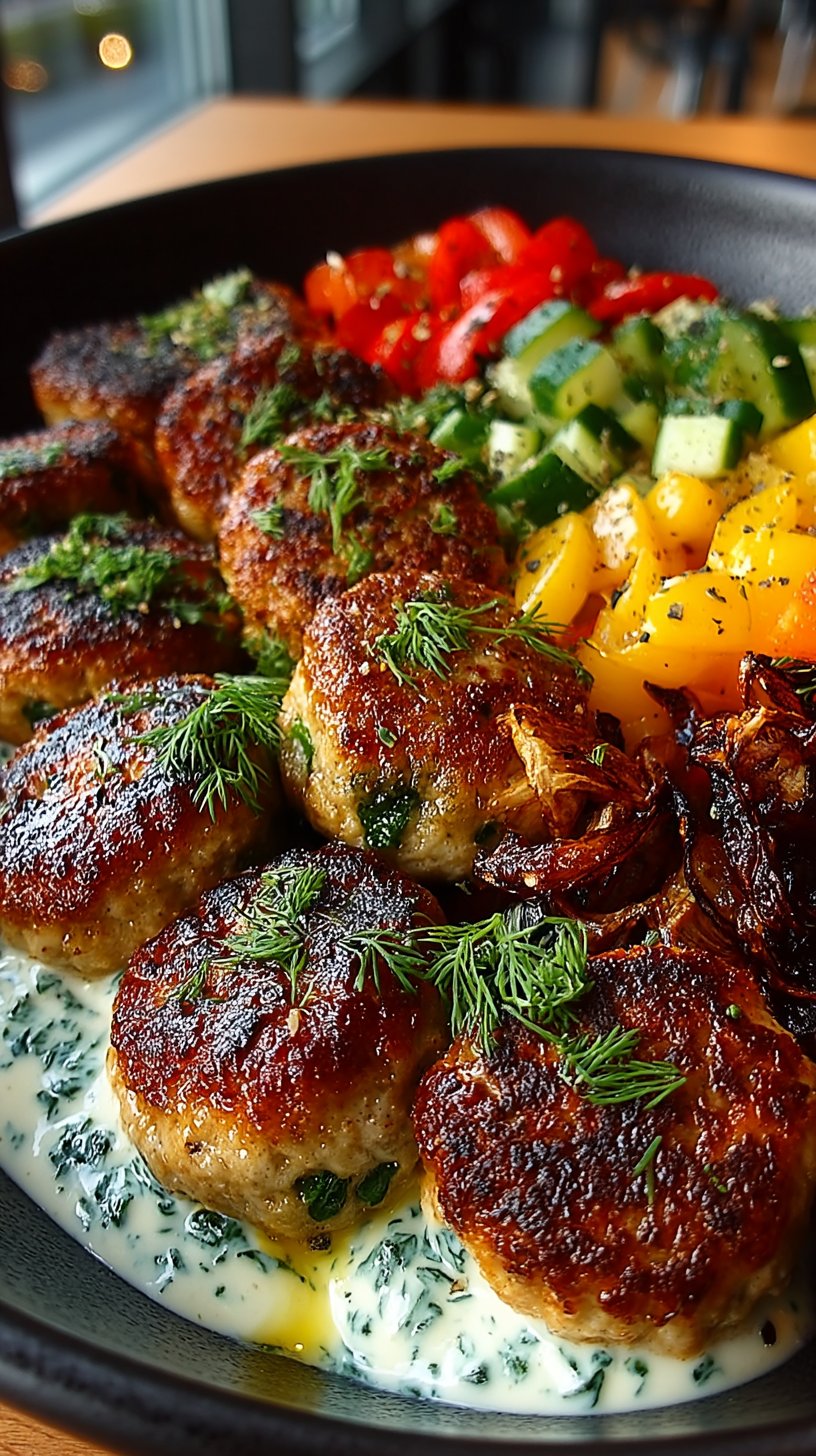
High-Protein Mediterranean Meatball Bowls
World Cuisine