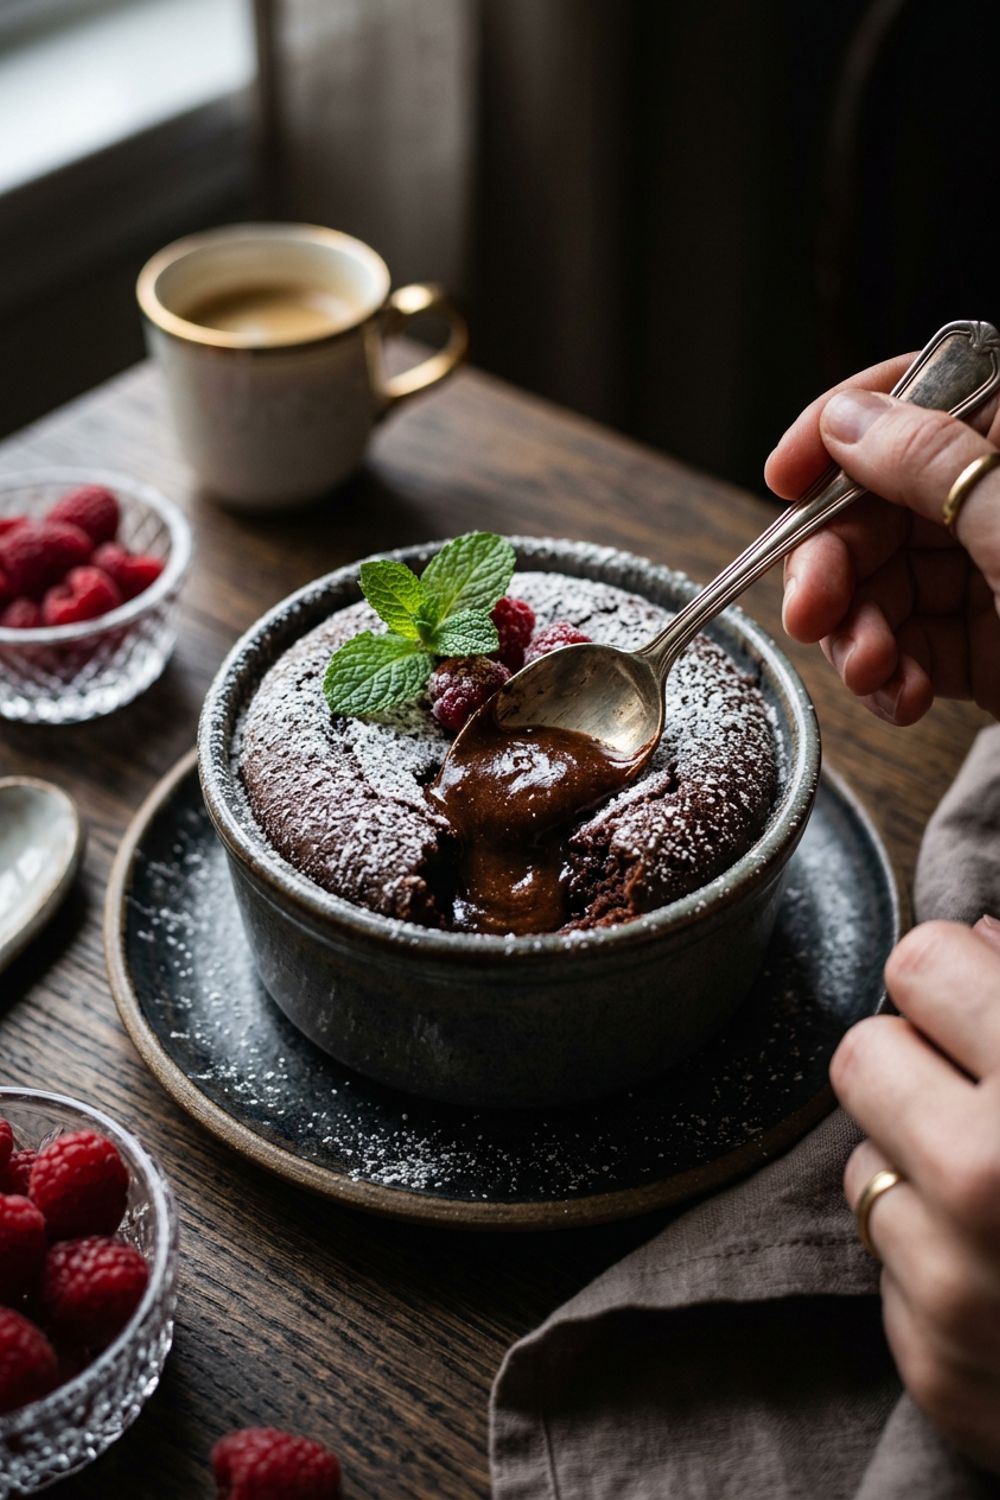
Desserts & Baking
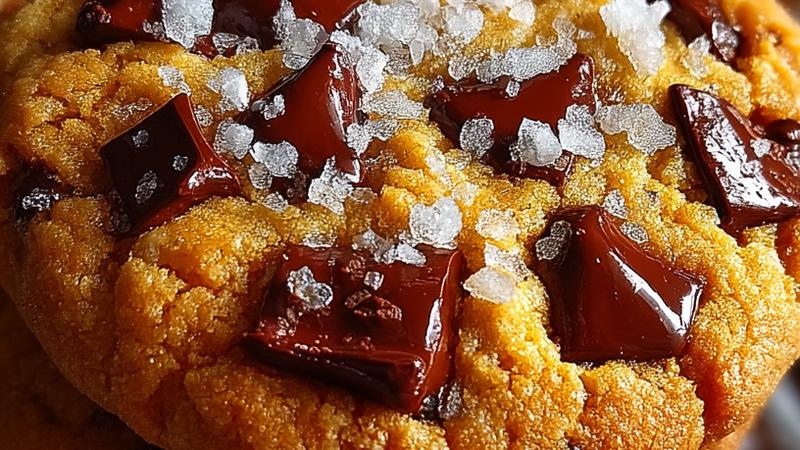
Scoopable Brown Butter Chocolate Chip Cookies
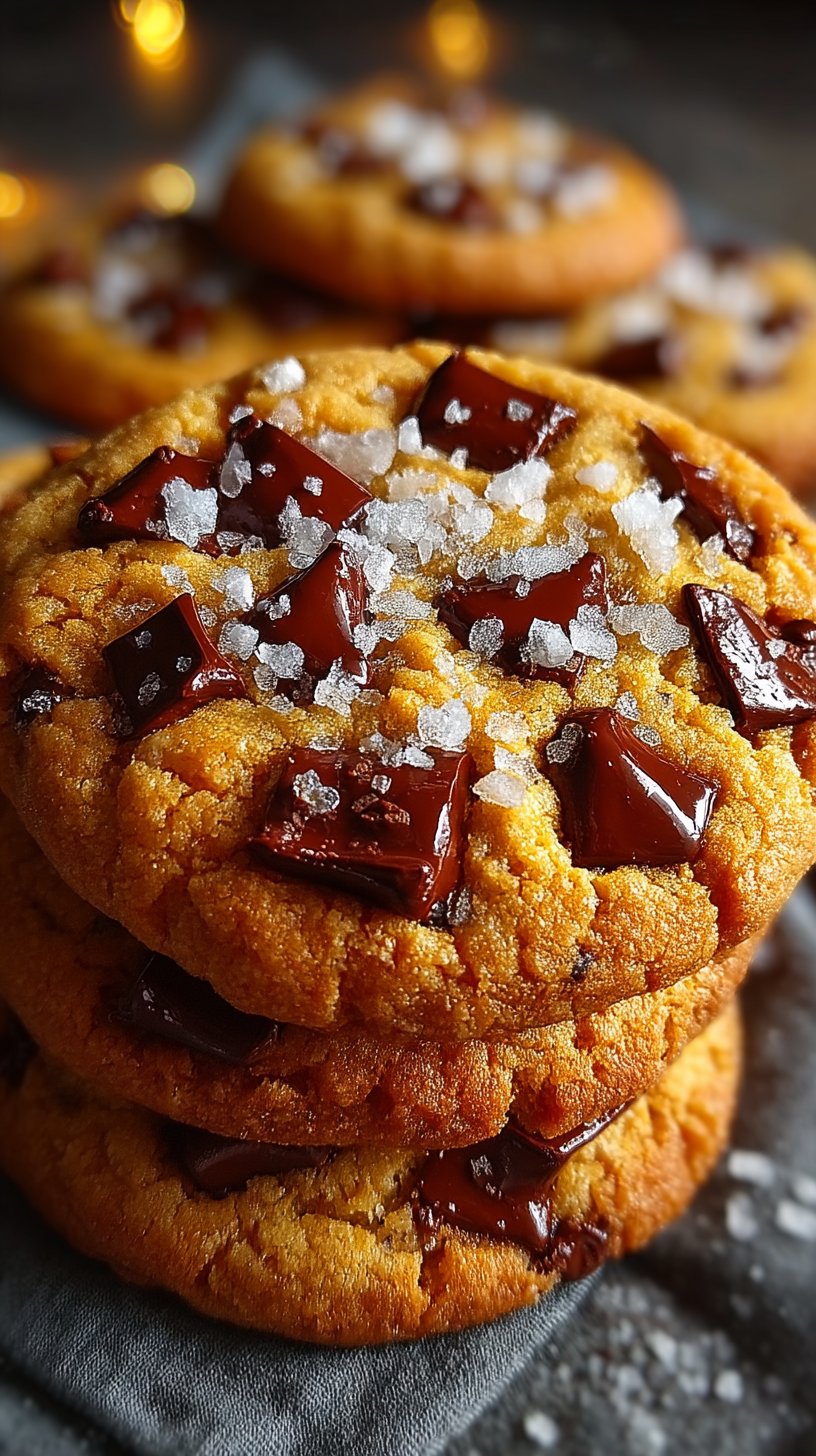
Learn how to make scoopable brown butter chocolate chip cookies with this easy recipe. Soft, chewy, and packed with rich, nutty flavor. Perfect every time!
Why Brown Butter Changes Everything
When I first discovered brown butter cookies, I was honestly skeptical. I mean, isn’t regular melted butter fine? But the moment I tasted that first cookie, I understood the hype. Brown butter isn’t just butter that’s been heated—it’s butter that’s been transformed through a chemical process called the Maillard reaction. During this process, the milk solids caramelize, developing rich, toasty, hazelnut-like flavors that are absolutely impossible to achieve with regular butter.
The beauty of brown butter in cookies is that it adds sophistication without requiring extra ingredients. You’re not adding anything new to your pantry; you’re simply coaxing out flavors that were already there. This is why these scoopable brown butter chocolate chip cookies taste like they’re from a fancy bakery, not your home kitchen—though they absolutely are homemade!
The Secret to Perfectly Scoopable Dough
I’ve always been a bit obsessed with cookie dough consistency. There’s nothing worse than dough that’s either too sticky to scoop or too dry and crumbly. The key to achieving that perfect scoopable texture is in the brown butter itself. Because brown butter has lost some of its water content during the browning process, it creates dough that’s naturally easier to work with than regular butter dough.
But here’s my pro tip: chilling makes all the difference. I always scoop my dough immediately after mixing, then refrigerate the whole tray for at least 30 minutes. This accomplishes two things. First, the cold dough is much easier to handle—it won’t fall apart or spread prematurely. Second, chilling allows the flavors to develop and marry together, which means you get more complex, deeper chocolate and butter flavors in every bite. Plus, it prevents that annoying spreading that happens when you bake warm dough. If you’re short on time, even 15 minutes of chilling helps considerably!
Chocolate Chip Selection Matters More Than You Think
I’ve tested this recipe with various chocolate combinations, and I’ve learned that one type of chocolate isn’t enough to create a truly exceptional cookie. Semi-sweet chocolate chips are classic for a reason—they have a balanced sweetness and familiar chocolate flavor that most people adore. Dark chocolate chips, on the other hand, bring sophistication. They have less sugar and more cocoa solids, which means they deliver a more intense, slightly bitter chocolate experience.
When you combine both types in these scoopable brown butter chocolate chip cookies, you get the best of both worlds. You maintain the comforting, nostalgic chocolate chip cookie experience while elevating it with deeper flavor notes. The ratio I use—about two parts semi-sweet to one part dark chocolate—creates the perfect balance. But honestly, feel free to adjust this based on your preferences. If you’re a dark chocolate fanatic, go heavier on the dark. If you prefer sweetness, use all semi-sweet. These are YOUR cookies, and they should taste exactly how you love them.
Baking Tips for Consistent Results
Over the years, I’ve learned that cookie baking is as much about technique as it is about ingredients. The first thing I always do is check my oven temperature with an oven thermometer. Seriously, most home ovens are off by 10-15 degrees, and this can completely change your results. If your oven runs hot, your cookies will bake faster and might spread too much. If it runs cool, they’ll bake slowly and might not develop enough color.
The second important tip is understanding the difference between ‘looks done’ and ‘actually done’ with cookies. I always pull these cookies out when the edges are golden brown but the centers still look slightly underdone. This seems counterintuitive, but it’s the secret to chewy cookies! The residual heat continues to cook the centers after you remove them from the oven, resulting in that perfect texture—crispy edges, chewy centers. If you bake until they look completely done, you’ll end up with cookies that are more cake-like throughout.
Finally, don’t skip the cooling time on the baking sheet. Those 5 minutes are crucial. They allow the cookies to set slightly while still warm, which locks in the texture you worked so hard to achieve. Then transfer them to a wire rack to cool completely, which allows air circulation and prevents them from getting soggy on the bottom.
Storage and Make-Ahead Options
One of my absolute favorite things about this recipe is how flexible it is for make-ahead baking. Life gets busy, and having homemade cookies ready to bake is a game-changer. Here’s my complete timeline for maximum convenience:
You can make the brown butter up to 3 days ahead and store it in an airtight container at room temperature. You can make the full cookie dough, scoop it onto baking sheets, and refrigerate for up to 3 days. You can also freeze the scooped dough for up to 3 months—just transfer the baking sheet to your freezer once the dough rounds are firm, then store them in a freezer bag.
When you’re ready to bake, simply preheat your oven and bake straight from the fridge or freezer. Frozen dough might need an extra 1-2 minutes, but you don’t need to thaw it first. Freshly baked cookies stored in an airtight container will last up to 5 days, though I find they’re best enjoyed within 2-3 days while they still have that slight chewiness. If they do dry out slightly, you can add a slice of bread to the container overnight—it will soften the cookies and keep the bread from getting stale. It’s honestly the most convenient cookie recipe I’ve ever made!
Ingredients
Brown Butter Base
Dry Ingredients
Mix-Ins
Instructions
Brown the Butter
This is where the magic happens! Place your unsalted butter in a small saucepan over medium heat. I always find this part so rewarding because you'll actually watch the transformation happen. Let it melt completely, then keep stirring occasionally as the milk solids sink to the bottom and turn a gorgeous golden-brown color. You're looking for that nutty, toasted aroma—it should take about 8-10 minutes. Once it smells incredible, pour it into a bowl (including those browned bits!) and let it cool for about 15 minutes. Trust me, this step elevates everything.
Combine Sugars and Cooled Brown Butter
Once your brown butter has cooled slightly but is still warm, pour it into a large mixing bowl with the granulated sugar and packed brown sugar. Using an electric mixer or whisking by hand, beat them together until well combined—you want that caramelized, nutty butter distributed evenly throughout. This mixture forms the foundation of our cookie dough, giving it that rich, complex flavor that makes everyone ask for your secret ingredient!
Add Eggs and Vanilla
One at a time, add your eggs to the brown butter-sugar mixture, beating well after each addition. Then add your vanilla extract and mix until everything is smooth and creamy. Don't rush this step—proper incorporation helps create that tender, cake-like yet chewy texture we're after. The mixture should look pale and fluffy, indicating you've incorporated enough air into your dough.
Whisk Dry Ingredients
In a separate medium bowl, whisk together your all-purpose flour, baking soda, and fine sea salt. I always sift mine because it helps break up any lumps and distributes the leavening agent evenly. This ensures your cookies will have that perfect uniform rise and texture throughout the batch. Set this mixture aside for now—we're almost ready to bring everything together!
Combine Wet and Dry
Gently fold the dry ingredient mixture into your wet ingredients using a spatula or wooden spoon. Be careful not to overmix—we want the dough to come together without developing too much gluten, which would make the cookies tough. Mix until just combined, then fold in your semi-sweet and dark chocolate chips. The combination of two chocolate types adds wonderful depth and complexity to each bite. If you're using the fleur de sel, hold off on adding it until later.
Scoop and Chill
This is my favorite step because it's where these cookies get their signature name! Using a 2-tablespoon cookie scoop (or an ice cream scoop if you prefer), portion your dough onto parchment-lined baking sheets, leaving about 2 inches between each cookie. I actually prefer to chill my scooped dough for at least 30 minutes, or even overnight in the fridge. This allows the flavors to develop and prevents excessive spreading, giving you those perfectly scoopable cookies with defined edges and chewy centers. You can also freeze them for up to 3 months!
Bake Until Golden
Preheat your oven to 350°F (175°C). Bake your chilled cookie dough for 11-13 minutes, until the edges are lightly golden but the centers still look slightly underdone—and I mean this! The residual heat will continue to cook them after removal, creating that perfect texture contrast. If you want crispier cookies, bake an additional 1-2 minutes. If using fleur de sel, sprinkle a tiny pinch on top of each cookie right when they come out of the oven.
Cool and Enjoy
Let your cookies cool on the baking sheet for 5 minutes before transferring them to a wire rack. This cooling period helps them set while they're still slightly warm, ensuring they maintain that coveted scoopable shape. Once completely cooled, store them in an airtight container for up to 5 days. Though honestly, they rarely last that long in my house!
Nutrition Information
Per serving (serves 24). Values are approximate.
| Calories | 185 calories |
| Total Fat | 10g |
| Saturated Fat | 6g |
| Carbohydrates | 23g |
| Sugar | 18g |
| Protein | 2g |
| Sodium | 160mg |
| Fiber | 1g |
* Percent Daily Values are based on a 2,000 calorie diet. Your daily values may be higher or lower depending on your calorie needs. Nutritional information is an estimate and may vary.
Never Miss a Recipe
Join 5,000+ home cooks and get new recipes straight to your inbox.
Frequently Asked Questions
Why is my brown butter so important in this recipe?
Brown butter is absolutely essential here! When you brown the butter, those milk solids caramelize and develop complex, nutty flavors that regular melted butter just can't provide. It's the secret ingredient that makes people say 'wow, what's different about these cookies?' The depth of flavor from browned butter transforms a standard chocolate chip cookie into something truly special. Plus, it adds this gorgeous golden color to your dough that's just beautiful.
Can I make the dough ahead of time?
Absolutely! This is one of my favorite parts about this recipe. You can scoop the dough and refrigerate it for up to 3 days, or freeze the scoops for up to 3 months. When you're ready to bake, just pop them straight into the oven—no thawing needed. If baking from frozen, add an extra 1-2 minutes to the baking time. This makes them perfect for when you want fresh-baked cookies without the effort of mixing everything up.
What's the difference between using one type of chocolate versus two?
Using both semi-sweet and dark chocolate chips creates a more complex flavor profile. The semi-sweet chips provide sweetness and that classic chocolate chip taste, while the dark chocolate adds deeper, slightly bitter cocoa notes. Together, they create a sophisticated balance that elevates the entire cookie experience. However, if you only have one type on hand, use all semi-sweet or all dark chocolate—the cookies will still be delicious!
Why do my cookies spread too much?
Spreading usually happens when the dough is too warm or the oven temperature is too low. This recipe specifically addresses this by recommending chilling the scooped dough. The cold dough holds its shape better during baking. Also, make sure you're using parchment paper and checking your oven temperature with an oven thermometer—ovens are often off by 10-15 degrees! Finally, don't skip the cooling time on the baking sheet; this helps them set properly.
Is the fleur de sel topping really necessary?
It's completely optional, but I highly recommend trying it! A tiny pinch of fleur de sel or Maldon sea salt sprinkled on top while the cookies are still warm creates an incredible sweet-salty contrast. It enhances the chocolate flavor and adds a gourmet touch. If you don't have specialty salt, regular sea salt works fine—just use less since it's finer. Start with a very small amount and adjust to your preference.

Hi, I'm Lisa!
I create simple, tested recipes from around the world that anyone can make at home.
Learn More →Reader Reviews
Based on 345 reviews