World Cuisine
Cabbage Dumplings Gyoza
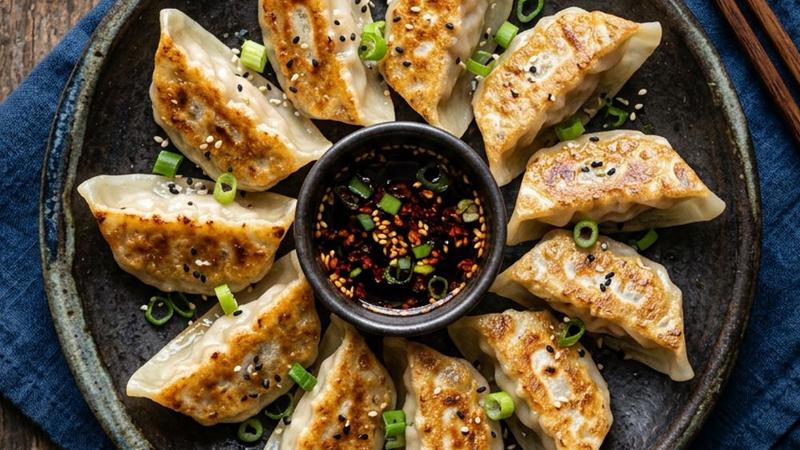
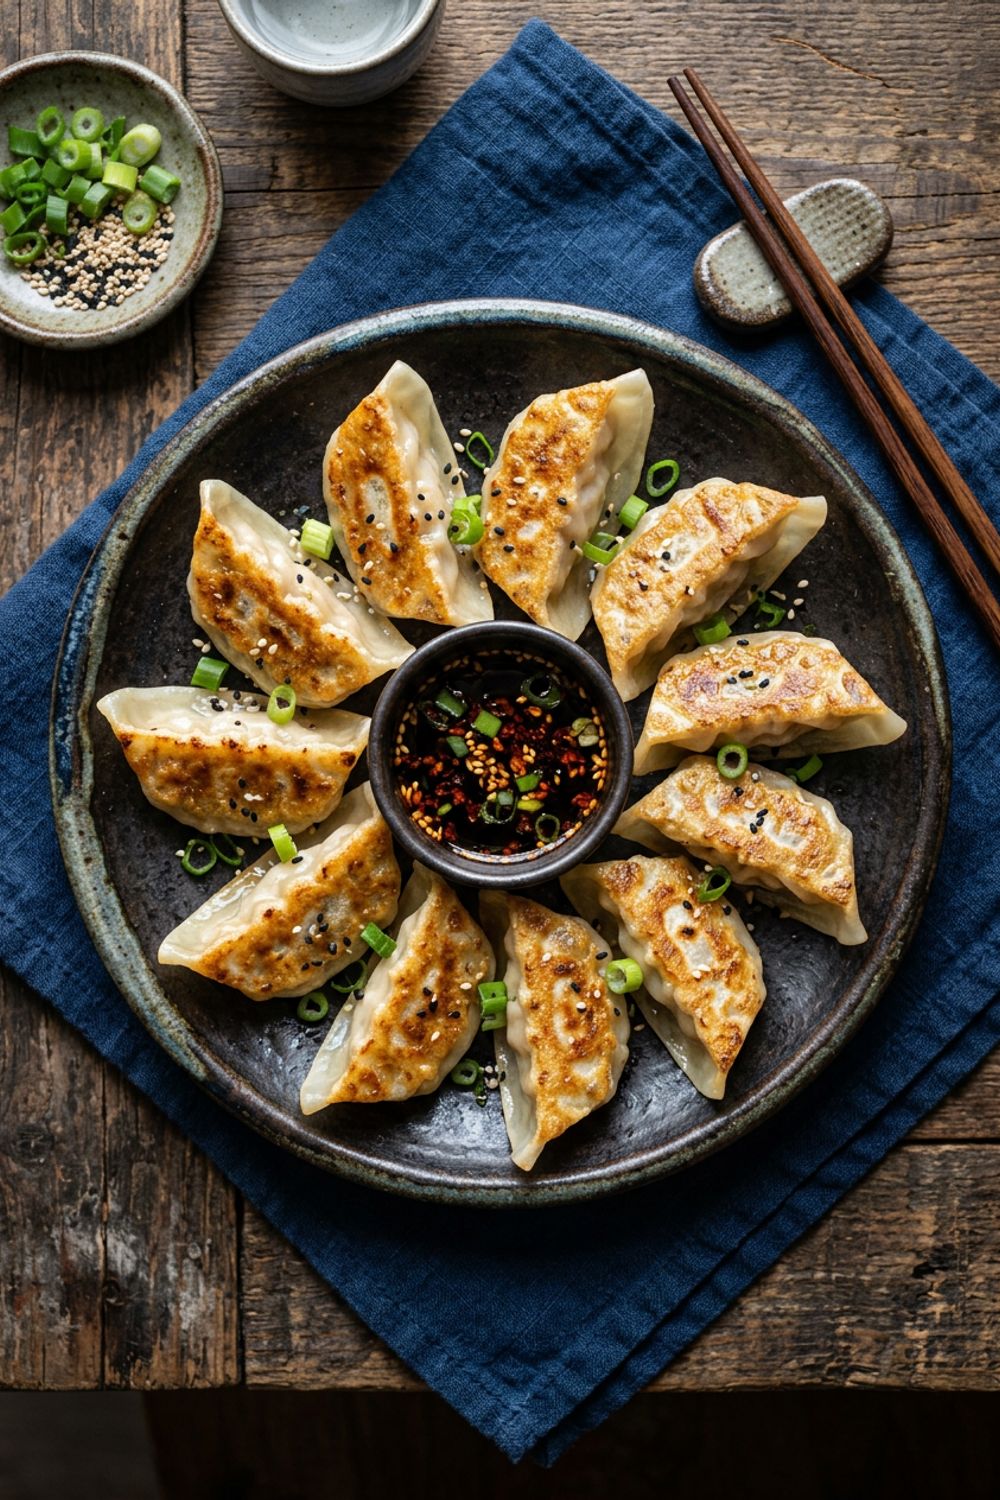
Crispy Japanese gyoza dumplings with a savory cabbage and pork filling, pan-fried to perfection with a lacy golden crust and tangy dipping sauce.
Why Japanese Gyoza Became My Dumpling Obsession
I have made dumplings from dozens of traditions — Polish pierogi, Chinese jiaozi, Nepali momos, Georgian khinkali — but Japanese gyoza hold a special place. There is something about the impossibly thin, crispy bottom combined with a juicy, ginger-laced filling that makes them irresistibly addictive. I fell in love at a tiny counter restaurant in Tokyo’s Shibuya district, where an older gentleman cooked nothing but gyoza all day, turning out perfectly golden crescents with machine-like precision.
What makes gyoza distinct is the cooking method. Frying, steaming, then frying again creates the “hane” — a delicate lacy crust connecting all the dumplings like a golden web. The filling is deliberately simple because beauty lies in balance: cabbage provides sweetness and moisture, pork adds richness, and the aromatics — ginger, garlic, scallion — give each bite a bright, clean punch. No single ingredient dominates.
Gyoza-making is one of the most therapeutic kitchen activities I have discovered. Once you find the rhythm of filling and pleating, it becomes almost meditative. This recipe makes about 40, perfect for dinner with leftovers or a casual gathering.
The Art of Preparing Gyoza Cabbage
Cabbage preparation is the single most important step. Raw cabbage holds tremendous water that turns dumplings into a soggy mess if not removed.
Shred the cabbage as finely as possible — no wider than a matchstick. Large pieces create air pockets and make pleating difficult. I use a sharp chef’s knife rather than a food processor, which releases moisture prematurely and creates mushy texture.
Salting draws out moisture through osmosis. After ten minutes, wrap the cabbage in a towel and squeeze with all your strength — every drop removed brings you closer to perfect gyoza. The goal is cabbage that feels almost dry but still has tenderness from the salt treatment.
Mastering the Classic Gyoza Pleat
The pleats are functional, not just decorative — they create a sealed edge and the signature crescent shape that lets gyoza sit upright. Hold the wrapper flat, moisten edges with water, pinch the top center closed, then create small folds on the front side only, pressing each against the smooth back. Five to six pleats creates a secure seal.
If pleating feels overwhelming, simply fold in half and press edges firmly. These half-moon gyoza taste exactly the same. As you gain confidence, gradually introduce pleats. A perfectly seasoned gyoza in an imperfect wrapper always beats a beautifully pleated one with bland filling.
Tips for Perfect Gyoza
Get your pan screaming hot. Preheat for two full minutes before adding oil. When oil shimmers and water sizzles on contact, place gyoza flat-side-down and do not move them.
Use the right amount of water. One-third cup for a 12-inch skillet holding about 20 gyoza. Too little and they will not cook through; too much and they become waterlogged.
Listen to your gyoza. During initial fry, a steady sizzle. After adding water, aggressive steaming. When the sizzle returns, the steaming is done and the crust is re-crisping. Loud, rapid sizzle with crackling means they are done.
Mix filling in one direction only. Stirring consistently in one direction for two minutes creates a protein network that makes filling cohesive and bouncy rather than crumbly.
Do not overfill. A heaping teaspoon per standard wrapper. Overfilled gyoza are impossible to seal and burst during cooking.
Variations to Try
Shrimp and Chive Gyoza. Replace pork with finely minced raw shrimp and substitute scallions with Chinese garlic chives. Add a teaspoon of mirin. Incredible dipped in ponzu with grated daikon.
Vegetable and Mushroom Gyoza. Finely diced shiitake mushrooms, crumbled firm tofu, and grated carrot. Add extra soy sauce and a teaspoon of miso paste for umami depth.
Cheese Gyoza. Mix the standard filling with shredded mozzarella. The cheese melts into a gooey center that is irresistible — a beloved izakaya bar snack in Japan.
Spicy Kimchi Gyoza. Add well-drained, finely chopped kimchi to the standard filling. Reduce soy sauce by half since kimchi adds its own salt.
How to Store
Freeze uncooked gyoza on a parchment-lined sheet in a single layer until solid (about 2 hours), then transfer to freezer bags. Keep up to 2 months. Cook from frozen using the same pan-fry method, adding 2-3 extra minutes of steaming and slightly more water. Cooked gyoza refrigerate for up to 2 days — reheat in a dry pan to re-crisp.
Troubleshooting
Wrappers tearing during filling. They have dried out — keep unused wrappers covered with a damp towel. Mist dried wrappers lightly with water.
Bottoms not getting crispy. Pan is not hot enough, or water remains when you remove the lid. Let all water evaporate completely. Drizzle extra oil around the edges for more crispiness.
Filling falling apart. The meat was not mixed enough — that two-minute mixing creates essential protein bonds. The cornstarch also acts as a binder. Chill filling before assembling.
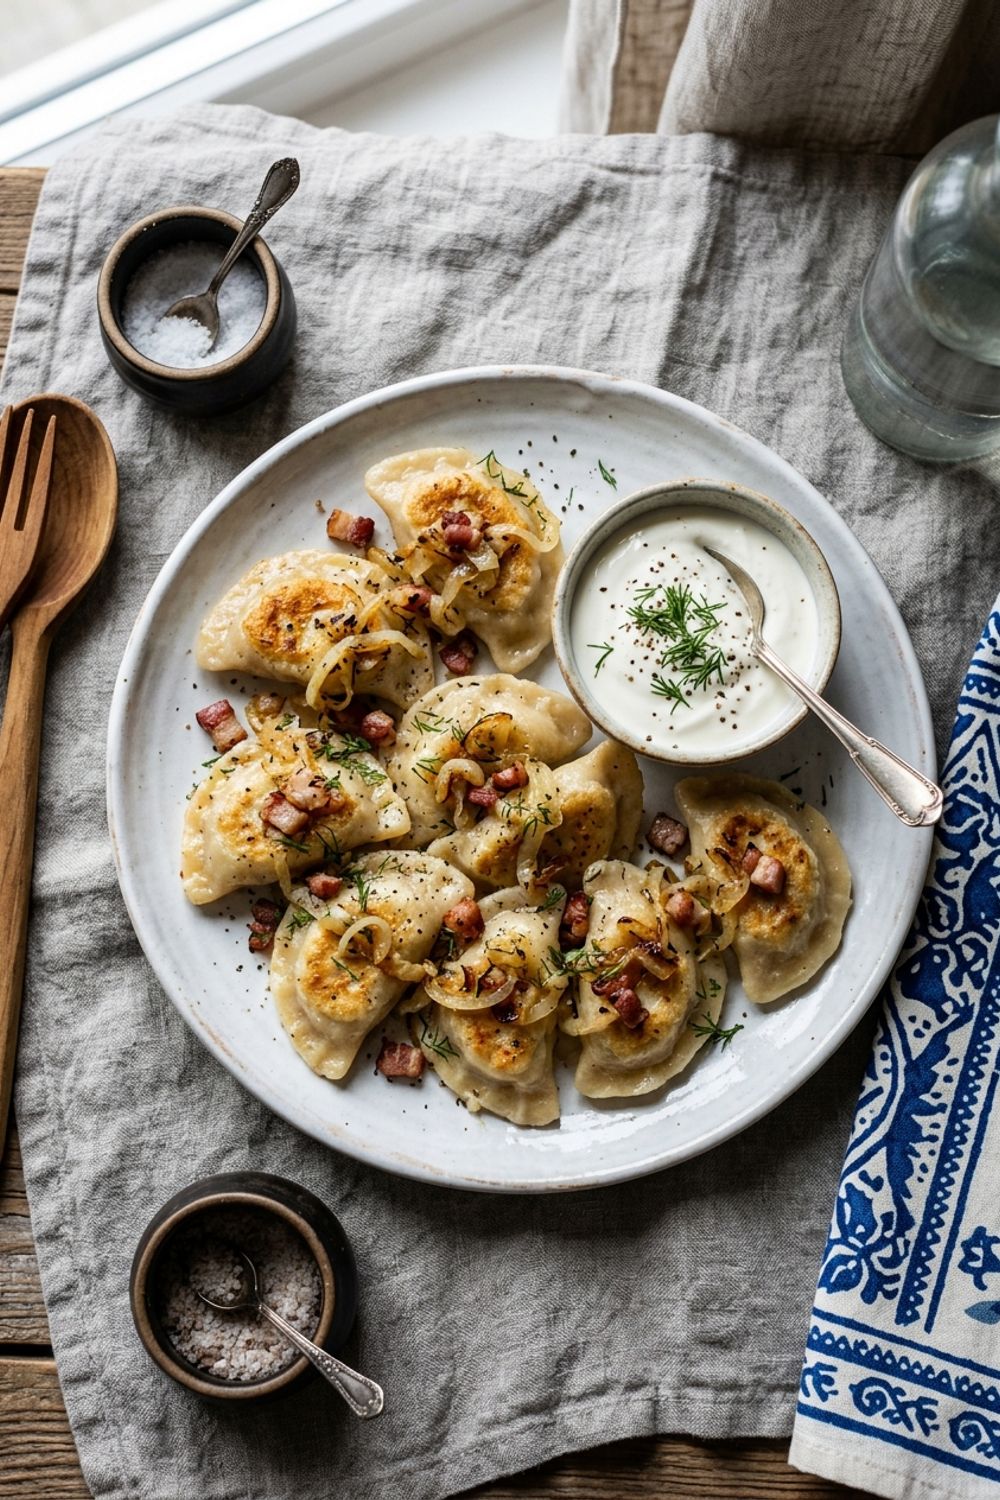
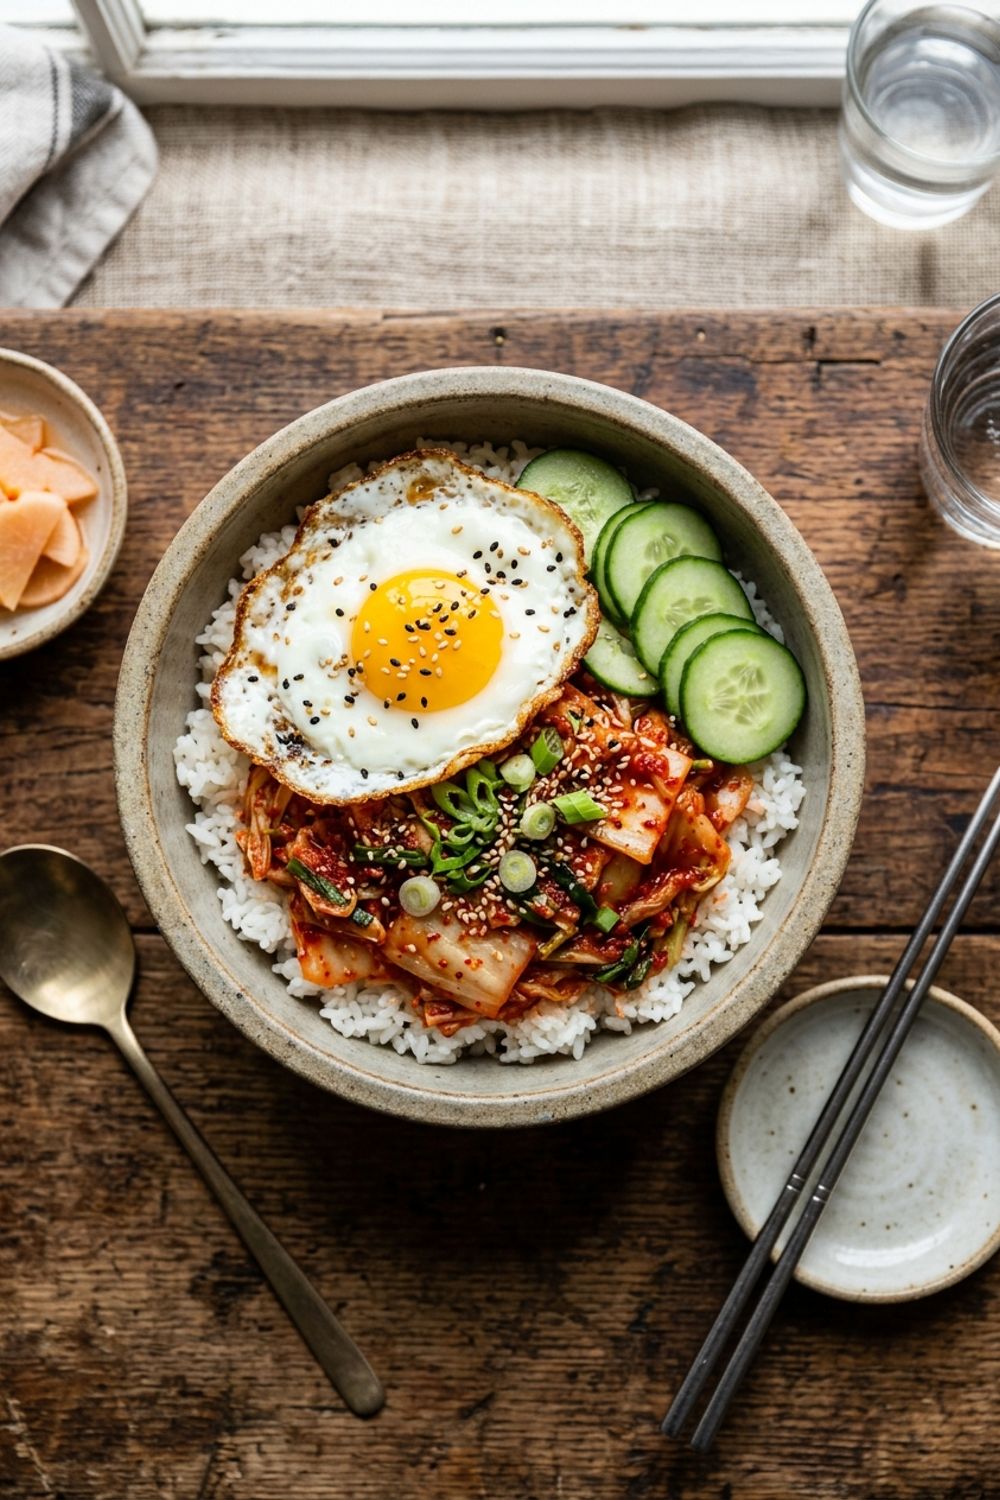
These gyoza are one of my most-cooked recipes. For more dumpling adventures, try my Cabbage Dumplings Polish Style for a completely different take. If you love Japanese flavors, explore my Fermented Cabbage Kimchi Bowl for bold Korean-inspired flavors.
Ingredients
Filling
Assembly and Cooking
Dipping Sauce
Instructions
Prepare the Cabbage
Finely shred the cabbage and place it in a large bowl. Sprinkle with 1/2 teaspoon of salt, toss to combine, and let sit for 10 minutes. Transfer the cabbage to a clean kitchen towel and squeeze out as much moisture as possible. This step is crucial — wet cabbage leads to soggy gyoza. You should be able to squeeze out at least 2-3 tablespoons of liquid.
Make the Filling
In a large bowl, combine the squeezed cabbage with the ground pork, minced scallions, garlic, grated ginger, soy sauce, sesame oil, sake, sugar, white pepper, and cornstarch. Mix vigorously in one direction with a fork or chopsticks for about 2 minutes until the mixture becomes slightly sticky and cohesive. Cover and refrigerate for 15 minutes to firm up.
Fold the Gyoza
Place a gyoza wrapper on your palm. Dip your finger in water and moisten the entire edge of the wrapper. Place a heaping teaspoon of filling in the center. Fold the wrapper in half, pinching the top center to seal. Create 5-6 pleats on the front side of the wrapper, pressing each pleat against the smooth back side to seal. The gyoza should have a crescent shape that sits flat on a surface. Place on a parchment-lined tray and repeat.
Pan-Fry the Gyoza
Heat 1 tablespoon of vegetable oil in a large non-stick skillet over medium-high heat. Arrange half the gyoza in tight rows, flat side down, in the pan. Cook without moving for 2-3 minutes until the bottoms are golden brown. Add 1/3 cup of water and immediately cover with a lid. Reduce heat to medium and steam for 4-5 minutes until the water has almost completely evaporated.
Create the Crispy Crust
Remove the lid and increase heat to medium-high. Continue cooking for another 1-2 minutes until all remaining moisture evaporates and the bottoms become deeply golden and crispy. You should hear a crackling, sizzling sound. Carefully slide a spatula under the gyoza and flip them onto a plate, crispy side up. Repeat with the remaining gyoza.
Make the Dipping Sauce
While the gyoza cook, whisk together the soy sauce, rice vinegar, sesame oil, chili oil, and sugar in a small bowl until the sugar dissolves. Serve alongside the hot gyoza immediately.
Nutrition Information
Per serving (serves 4). Values are approximate.
| Calories | 350 calories |
| Total Fat | 16g |
| Saturated Fat | 4g |
| Carbohydrates | 36g |
| Sugar | 4g |
| Protein | 18g |
| Sodium | 920mg |
| Fiber | 2g |
* Percent Daily Values are based on a 2,000 calorie diet. Your daily values may be higher or lower depending on your calorie needs. Nutritional information is an estimate and may vary.
Never Miss a Recipe
Join 5,000+ home cooks and get new recipes straight to your inbox.
Frequently Asked Questions
Can I make gyoza wrappers from scratch?
Yes! Mix 2 cups of all-purpose flour with 3/4 cup of boiling water and a pinch of salt. Knead for 10 minutes until smooth, rest for 30 minutes, then divide into 40 pieces and roll each into a thin 3.5-inch circle. Homemade wrappers have a slightly chewier texture that many people prefer.
How do I prevent gyoza from sticking to the pan?
Use a well-seasoned or non-stick pan and make sure the oil is hot before placing the gyoza. Do not move them during the initial frying phase. If they stick when you try to flip them, slide a thin spatula gently underneath. A splash of additional oil around the edges can help release stubborn spots.
Can I use a different protein instead of pork?
Absolutely. Ground chicken or turkey work well with the same seasonings. For a vegetarian version, replace the pork with extra-firm tofu (pressed and crumbled) plus finely diced shiitake mushrooms. Add an extra tablespoon of soy sauce to compensate for the reduced umami.
What is the best way to freeze gyoza?
Arrange uncooked gyoza on a parchment-lined sheet in a single layer without touching. Freeze for 2 hours until solid, then transfer to freezer bags. Cook from frozen by adding 2 extra minutes to the steaming time. They keep for up to 2 months.

Hi, I'm Lisa!
I create simple, tested recipes from around the world that anyone can make at home.
Learn More →Reader Reviews
Based on 271 reviews