Soups & Comfort Food
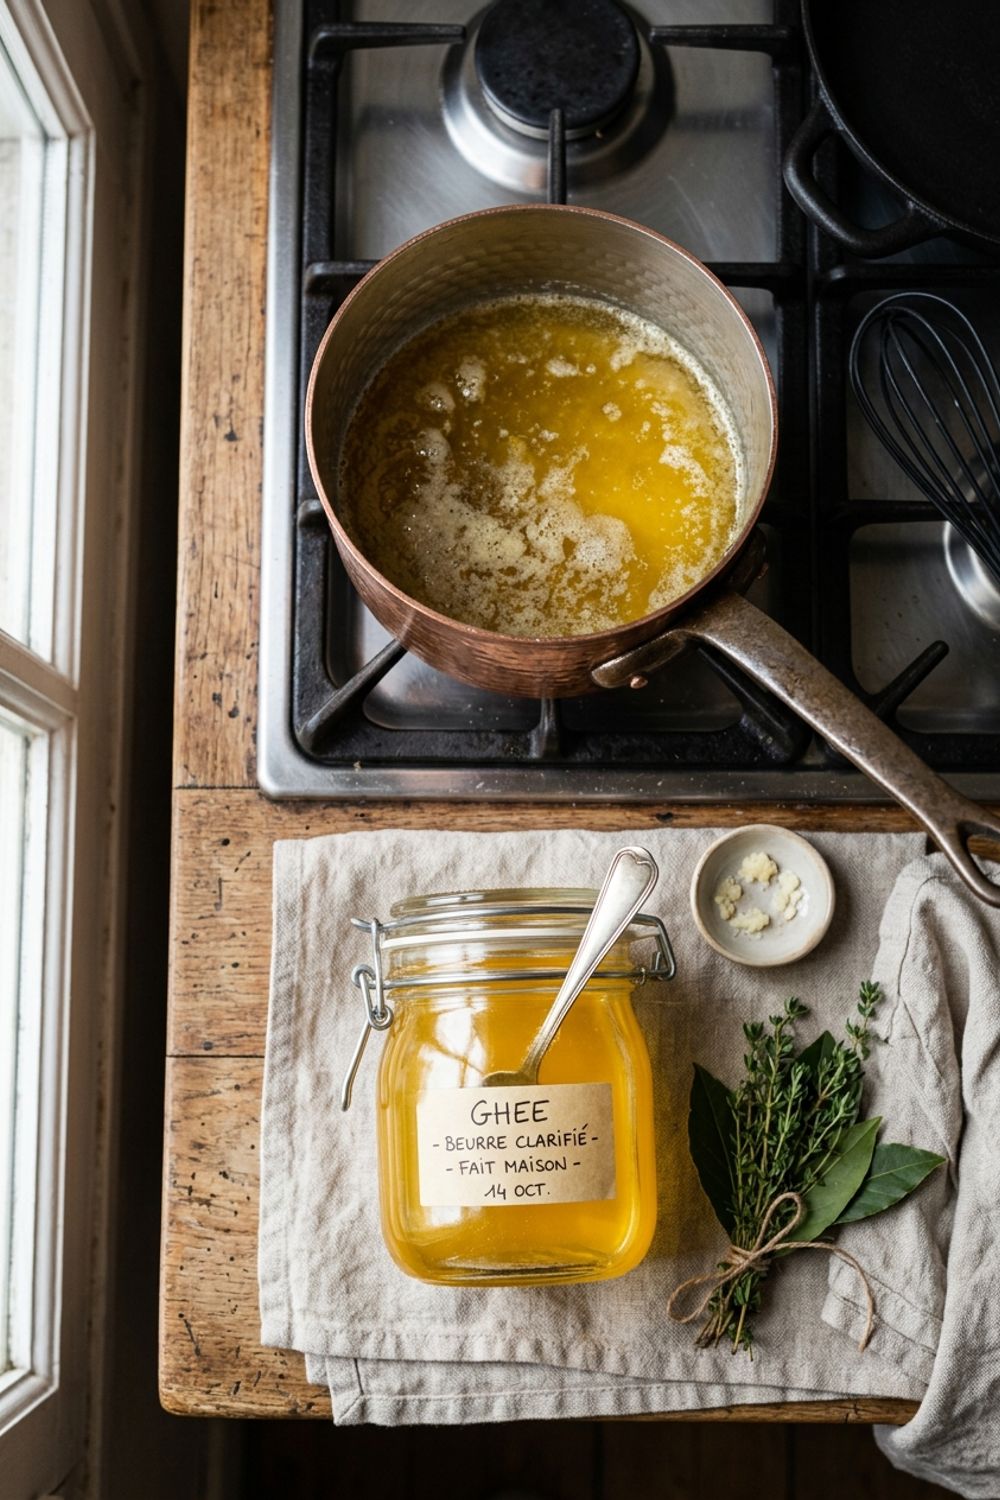
How to Make Clarified Butter (Ghee)
Learn how to make clarified butter and ghee at home with this simple guide. Pure golden butterfat with a high smoke point, perfect for cooking and baking.

Why Homemade Clarified Butter Is Worth Making
I genuinely cannot overstate how much of a game-changer homemade clarified butter has been in my kitchen. Before making my own, I burned regular butter constantly when searing steaks, cooking omelets, or making roux. The milk solids in regular butter start browning at around 250°F, meaning any heat above medium puts you on the clock. Clarified butter raises the smoke point to roughly 450°F, giving you all the rich flavor of butter with the heat tolerance of a neutral oil.
The first time I seared fish in clarified butter and got a perfectly golden, restaurant-quality crust without a single wisp of smoke, I was completely converted. Now I make a batch every few weeks, and it lives in a jar on my counter ready for anything that needs high heat and great flavor.
What I find fascinating is that this technique bridges two major culinary traditions. In French cooking, clarified butter (beurre clarifie) is essential for hollandaise, roux, and sauteed preparations. In Indian cooking, ghee — essentially clarified butter taken one step further — is the foundation of almost everything. The extra step of browning the milk solids gives ghee a deep, nutty, caramelized flavor. I am teaching you both methods here because they are equally valuable and nearly identical in technique.
The Science Behind the Process
Regular butter is approximately 80 percent fat, 15 percent water, and 5 percent milk solids. The water evaporates first (causing the sputtering when butter melts in a hot pan). The milk solids burn at relatively low temperatures. The fat itself is heat-stable until much higher temperatures.
Clarifying is simply separating these components and keeping only the pure fat. When you melt butter over low heat, gravity does the work: water evaporates as steam, milk solids sink to the bottom, and whey proteins float as white foam. The clear golden liquid between is pure butterfat.
I insist on low heat because if it is too high, the water evaporates too quickly (causing splattering), and the milk solids burn before fully separating. Think of this as a meditation — set the lowest flame, walk away, and check in five-minute intervals. The sounds tell you the stage: vigorous bubbling means water is still leaving, quiet small bubbles mean the water is mostly gone, and silence means it is done.
Clarified Butter vs. Ghee
The decision comes down to your intended use and flavor preference. Clarified butter is the French approach — stop as soon as the butter separates and the liquid is clear. The milk solids stay white, and the product has a clean, pure butter flavor perfect for delicate preparations like hollandaise, sauteed sole, or pastry.
Ghee takes it further. Continue simmering until the solids turn golden brown, filling the kitchen with the aroma of toasted nuts and caramel. This Maillard reaction infuses the butterfat with a deeper, more complex flavor. Ghee tastes warm, nutty, and almost sweet — essential in Indian cuisine for cooking spices, finishing rice, and enriching sauces. I use ghee when I want bolder flavor: drizzled on popcorn, sauteing vegetables, or melted over steamed rice.
Both have the same smoke point (around 450°F) and shelf stability. Both are lactose- and casein-free. The only difference is flavor. I recommend making both and keeping them in separate jars.
Tips for Perfect Results
Start with quality butter. Since you are concentrating butter down to pure fat, every flaw is amplified. European-style or grass-fed butter has higher fat content (82-84% vs. 80%), yielding more per pound. One pound yields approximately 12 ounces of clarified butter.
Use a heavy-bottomed pan. Thin pans create hot spots where solids burn. A medium stainless steel or enameled saucepan distributes heat evenly.
Never stir. Stirring disrupts the separation. The solids need to settle undisturbed and the foam needs to float peacefully. Set the heat, walk away, and check by looking, not touching.
Strain through cheesecloth. A regular fine-mesh strainer lets fine particles through, causing cloudiness. Double cheesecloth over the strainer catches everything. A coffee filter also works but drains much slower.
Watch the color for ghee. The transition from clarified butter to ghee happens in a narrow 2-3 minute window. Once solids start browning, they go from golden to burnt very quickly. Pull at the color of lightly toasted bread — residual heat continues darkening.
Variations and Uses
Brown Butter (Beurre Noisette). Stop just past the ghee stage when solids are deep amber. Strain and use for pasta, baked goods, or drizzled over roasted vegetables.
Herb-Infused Clarified Butter. While still warm, add a rosemary sprig, sage leaves, or smashed garlic. Infuse 20 minutes, then remove. Use for sauteing potatoes or finishing grilled meats.
Spiced Ghee. An Indian tradition: bloom a cinnamon stick, cardamom pods, and cumin seeds in warm ghee. Steep 30 minutes, strain. Transforms simple rice or lentils.
Sweet Clarified Butter. Add a split and scraped vanilla bean while clarifying. The subtle fragrance is incredible in pastry, on pancakes, or for making caramel.
How to Store
The beauty of removing milk solids and water is remarkable shelf stability. Clarified butter lasts 3 months at room temperature in a sealed jar, 6 months refrigerated. Ghee is even more stable — up to a year refrigerated, 3-4 months at room temperature. Always use a clean, dry utensil when scooping. At room temperature, both are soft and spreadable. Refrigerated, they solidify like coconut oil. Both states are normal. Glass jars are the best storage choice — they do not absorb odors.
Making clarified butter is a foundational kitchen skill that pays dividends every time you cook. If you are building your French technique toolkit, try my cheese souffle next — its bechamel benefits beautifully from clarified butter. My guide to making a cartouche is another essential technique. And for something completely different, my creamy spinach stuffed salmon pairs wonderfully with a drizzle of herb-infused ghee.
Ingredients
Instructions
Melt the Butter
Cut the butter into tablespoon-sized pieces and place in a medium heavy-bottomed saucepan over medium-low heat. Allow the butter to melt slowly and completely, about 3-4 minutes. Do not stir.
Simmer and Separate
Once fully melted, reduce heat to the lowest setting. The butter will begin to separate into three layers: a white foam on top (whey proteins), clear golden liquid in the middle (pure butterfat), and white milk solids settling at the bottom. Let it simmer gently for 15-20 minutes without stirring.
Skim the Foam (Clarified Butter)
For clarified butter: Use a fine mesh spoon or small ladle to carefully skim off the white foam from the surface. Discard or save for adding to mashed potatoes or vegetables.
Continue for Ghee (Optional)
For ghee: Do not skim. Continue simmering on low heat for an additional 5-10 minutes until the milk solids at the bottom turn light golden brown and the butter smells nutty and toasty. This extra step gives ghee its characteristic caramelized flavor.
Strain
Remove from heat and let cool for 2 minutes. Line a fine-mesh strainer with a double layer of cheesecloth and set it over a clean, dry glass jar or heatproof container. Slowly pour the golden liquid through the strainer, leaving any remaining milk solids behind in the pan.
Cool and Store
Allow the clarified butter to cool to room temperature before sealing the jar. It will become more opaque and solid as it cools. Store in the refrigerator for up to 6 months or at room temperature for up to 3 months.
Nutrition Information
Per serving (serves 16). Values are approximate.
| Calories | 120 calories |
| Total Fat | 14g |
| Saturated Fat | 9g |
| Carbohydrates | 0g |
| Sugar | 0g |
| Protein | 0g |
| Sodium | 0mg |
| Fiber | 0g |
* Percent Daily Values are based on a 2,000 calorie diet. Your daily values may be higher or lower depending on your calorie needs. Nutritional information is an estimate and may vary.
Never Miss a Recipe
Join 5,000+ home cooks and get new recipes straight to your inbox.
Frequently Asked Questions
What is the difference between clarified butter and ghee?
Clarified butter is pure butterfat with the milk solids and water removed. Ghee takes it one step further by browning the milk solids before straining, which gives it a deeper, nuttier flavor. Both have high smoke points and are lactose-free.
Can I use salted butter?
I recommend unsalted butter because the salt concentrates as the water evaporates, which can make the end product too salty. If salted butter is all you have, use it but do not add extra salt when cooking with it.
How do I know when it is done?
For clarified butter, it is done when the bubbling slows significantly and the liquid is clear golden with white solids settled at the bottom. For ghee, continue until those solids turn light golden brown and you smell a nutty aroma.
Why does my clarified butter taste burnt?
The heat was too high. Clarified butter should be made on the lowest heat setting your stove offers. If the milk solids burn (turn dark brown or black), the bitter flavor will transfer to the butterfat. Start over with fresh butter and lower heat.
Is clarified butter dairy-free?
Clarified butter and ghee are free of lactose and casein, which are the components that cause most dairy sensitivities. However, they are still technically derived from dairy, so people with severe milk allergies should consult their doctor.

Hi, I'm Lisa!
I create simple, tested recipes from around the world that anyone can make at home.
Learn More →Reader Reviews
Based on 454 reviews