Quick & Easy
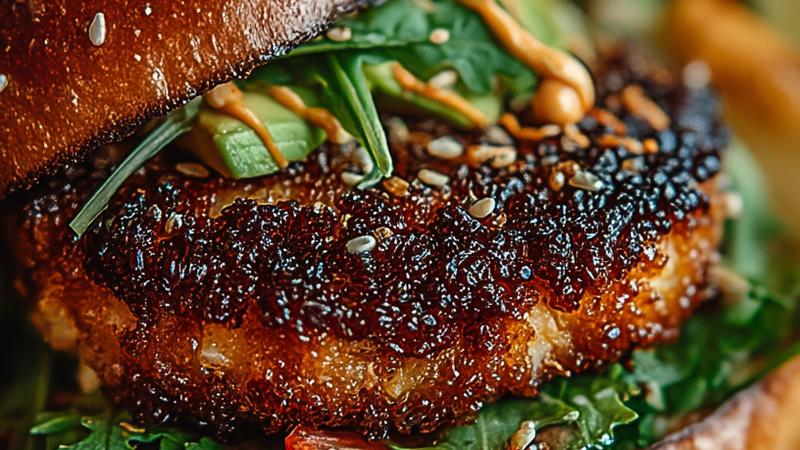
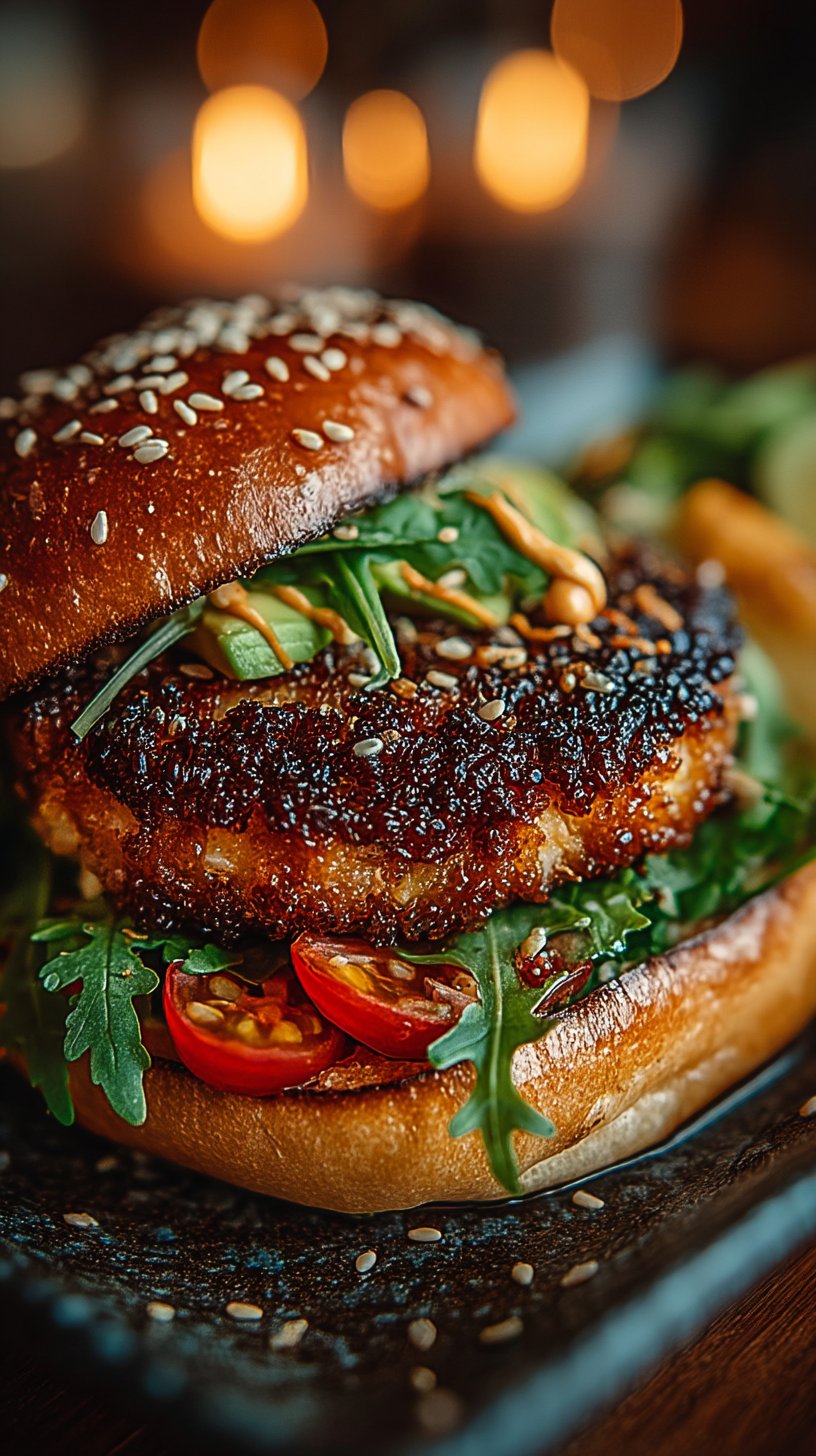
Crispy Spicy Tuna California Avocado Burger
Learn how to make crispy spicy tuna California avocado burgers at home. This quick, easy recipe combines seared tuna, creamy avocado & fresh toppings.
Why I Love Making Crispy Spicy Tuna California Avocado Burgers
I first fell in love with this flavor combination at a small sushi restaurant in Los Angeles, and I’ve been obsessed ever since. There’s something magical about combining the best elements of a California roll—that creamy avocado, fresh vegetables, and delicate tuna—into burger form. What makes this recipe special to me is how it bridges the gap between casual American burger culture and refined Japanese flavors. It’s restaurant-quality but totally achievable at home, which is exactly my cooking philosophy. The crispy exterior of the seared tuna contrasts beautifully with the creamy avocado, while the spicy mayo adds a kick that keeps every bite interesting. I’ve served this to friends who weren’t even expecting to love it, and it’s become a dinner party favorite. The best part? It comes together in about 35 minutes, making it perfect for a weeknight dinner or casual entertaining.
Choosing the Perfect Tuna for Your Burgers
This is where quality really matters, so I never skip this step. I always visit my local fishmonger and ask specifically for sushi-grade ahi tuna. The term ‘sushi-grade’ means the tuna has been frozen at specific temperatures to eliminate parasites, making it safe to eat raw or minimally cooked. When I select my tuna, I look for a deep red color with a slight metallic sheen, good marbling, and absolutely no fishy smell—if it smells ‘fishy,’ it’s not fresh enough. I ask the fishmonger to slice it to order, then I take it home and work with it immediately. If you can’t find ahi tuna, you can use sushi-grade yellowfin or even a very fresh bluefin tuna. The key is building a relationship with a trustworthy fishmonger who sources from reputable suppliers. This investment in quality tuna transforms the entire burger experience.
The Secret to Perfect Crispy Tuna Patties
After making these burgers dozens of times, I’ve discovered a few key techniques that make all the difference. First, keeping everything cold is essential—work with chilled tuna and a cold mixing bowl, and definitely refrigerate your shaped patties before cooking. This helps them hold together and ensures a better sear. Second, resist the urge to flip them multiple times or press down on them while cooking. Let them sit undisturbed for those first 3-4 minutes so a beautiful crust can form. Third, don’t overmix your tuna mixture. The panko breadcrumbs and egg are just there to bind everything together lightly; overmixing develops gluten and creates a dense, rubbery patty. Fourth, use medium-high heat with enough oil to create a proper sear. You want that oil shimmering and hot before the patties hit the pan. Finally, remember that sushi-grade tuna cooks very quickly. Those 3-4 minutes per side create a perfectly seared exterior with a rare to medium-rare center, which is exactly where you want it. If you prefer it more cooked, adjust accordingly, but trust me, this minimal cooking is what keeps tuna so tender and buttery.
Building Your Burger: The Perfect Layering Strategy
I’ve learned through experimentation that layering matters just as much as the individual components. Starting from the bottom: the mayo acts as a flavor barrier and helps seal the bun. The greens or arugula come next, and this is crucial because they create a moisture barrier that keeps the bun from getting soggy while adding fresh, peppery flavor. Then I add cucumber slices, which provide crunch and cooling freshness. The red onion adds bite and a beautiful visual contrast. The hot tuna patty goes on next while it’s still warm, followed by the avocado slices arranged carefully on top. The avocado placement is important because it adds creaminess to every bite and complements the spice beautifully. Finally, sesame seeds and cilantro add visual appeal and an authentic flourish. This layering ensures that every single bite has a perfect combination of textures and flavors. I’ve also learned to gently press the burgers together and cut them diagonally, which not only looks beautiful on the plate but somehow makes them taste even better!
Making This Recipe Your Own
While I love this recipe exactly as written, I’m all about making it personal to your preferences. Love extra heat? Add more wasabi powder to the tuna mixture or increase the sriracha. Prefer milder flavors? Use regular mayo and less spicy ingredients. Want to add more vegetables? Thin slices of roasted or fresh beets add beautiful color, or try adding mango slices for a tropical twist that pairs wonderfully with spicy tuna. Not a fan of avocado? Substitute with a creamy cucumber salad or even a light wasabi aioli. Like it crunchier? Add more panko to the tuna mixture for extra texture. Prefer different buns? Use pretzel buns for earthiness, whole wheat buns for nutrition, or even English muffins for a different vibe. The beauty of this recipe is that it’s a canvas for your personal taste preferences while maintaining that special balance of flavors that makes it shine. I encourage you to play with it and find your perfect version!
Serving and Pairing Suggestions
These spicy tuna burgers deserve thoughtful accompaniments that complement rather than compete with their flavors. I typically serve them with crispy shoestring fries dusted with sea salt and a little sesame oil, or sometimes with a light Asian slaw made with cabbage, carrots, and a ginger-lime dressing. A cold Japanese beer or a crisp white wine like Sauvignon Blanc pairs beautifully. If it’s warmer weather, I love serving these with an edamame salad or a cucumber-seaweed salad on the side. For a lighter option, serve with a simple arugula salad with lemon vinaigrette. The key is keeping your sides fresh and light so they don’t overshadow the star of the show—that amazing tuna patty. I never serve heavy sides with these burgers because they feel fresh and refined, and you want to taste every component clearly. If you’re making these for a group, set up a fun topping bar where everyone can customize their burger slightly—some people love extra cilantro, others prefer to skip certain vegetables. It’s interactive and ensures everyone gets exactly what they want!
Ingredients
For the Tuna Patties
For Assembly
Instructions
Prepare Your Tuna Mixture
I start by finely dicing the sushi-grade ahi tuna into small, uniform pieces. It's crucial to use the freshest tuna you can find—I always ask my fishmonger to slice it fresh. In a large mixing bowl, combine the diced tuna with sriracha, soy sauce, sesame oil, fresh ginger, minced garlic, and wasabi powder if you like extra heat. The key here is keeping everything cold, so work quickly and make sure your bowl is chilled. Add the panko breadcrumbs, beaten egg, chopped green onions, salt, and pepper. Gently fold everything together with a spatula—don't overmix, as you want to keep the tuna's delicate texture intact. The mixture should hold together but still feel light and fresh.
Shape and Chill the Patties
Once your tuna mixture is ready, divide it into 4 equal portions. Using your hands (keep them slightly wet to prevent sticking), gently shape each portion into a patty about 3/4-inch thick and roughly 4 inches in diameter. Place the patties on a parchment-lined plate and refrigerate for at least 15 minutes. This step is important because it helps the patties hold together better during cooking and gives the flavors time to meld beautifully. I love how the cold tuna becomes firm and easier to handle!
Prepare Your Toppings
While the patties chill, I prepare all my toppings. Slice the ripe avocados lengthwise, remove the pit, and gently scoop the flesh into slices. Immediately toss them with fresh lime juice to prevent browning and add brightness. Slice your cucumber into thin rounds, thinly slice the red onion, and wash and dry your greens or arugula. Mix your mayo with sriracha if making spicy mayo, or use Japanese mayo for that authentic flavor. Toast your brioche buns lightly—this prevents them from getting soggy and adds a wonderful texture contrast. Having everything prepped makes assembly quick and stress-free when your tuna is hot from the pan!
Cook the Tuna Patties
Heat 2 tablespoons of vegetable oil in a large skillet over medium-high heat until it's shimmering and hot. Carefully place your chilled tuna patties into the pan—they should sizzle immediately. This is the moment I get excited because that sound means we're about to get that perfect crispy exterior! Cook for 3-4 minutes on the first side without moving them. You want a beautiful golden-brown crust to form. Flip gently using a wide spatula and cook for another 2-3 minutes on the second side. The tuna should be rare to medium-rare in the center—remember, this is sushi-grade tuna and it's safest and most delicious when barely cooked through. The exterior should be crispy and golden while the inside remains tender and slightly pink.
Toast the Buns
If you haven't already, place your brioche buns cut-side down on a separate skillet or griddle over medium heat for 1-2 minutes until lightly golden and warm. This step makes such a difference in the final burger experience. The toasted buns provide structural support and add a subtle sweetness that complements the spicy, savory tuna beautifully. Make sure not to burn them—you want just a light golden color.
Assemble Your Burgers
This is where the magic happens! Spread a generous dollop of sriracha mayo or Japanese mayo on the bottom bun of each toasted brioche. Layer a small handful of fresh greens or arugula on top of the mayo—this creates a protective barrier that keeps the bun from getting too soggy. Add 2-3 slices of cucumber, followed by a few red onion slices. Now place your hot, crispy tuna patty on top, and finish with 3-4 avocado slices arranged beautifully. Sprinkle with sesame seeds and fresh cilantro leaves for that authentic California-inspired touch.
Top and Serve
Place the top bun gently on each burger. If you'd like, you can serve these burgers cut in half diagonally for a more elegant presentation. Serve immediately while the tuna patties are still warm and crispy. I recommend pairing these with crispy fries, a fresh Asian slaw, or a light salad. These burgers are best enjoyed right away, but trust me, they're so delicious that won't be an issue!
Nutrition Information
Per serving (serves 4). Values are approximate.
| Calories | 485 calories |
| Total Fat | 22g |
| Saturated Fat | 4g |
| Carbohydrates | 35g |
| Sugar | 4g |
| Protein | 38g |
| Sodium | 680mg |
| Fiber | 4g |
* Percent Daily Values are based on a 2,000 calorie diet. Your daily values may be higher or lower depending on your calorie needs. Nutritional information is an estimate and may vary.
Never Miss a Recipe
Join 5,000+ home cooks and get new recipes straight to your inbox.
Frequently Asked Questions
Can I use regular tuna instead of sushi-grade?
I really recommend using sushi-grade ahi tuna for this recipe since we're cooking it minimally. Sushi-grade tuna is frozen to specific temperatures to kill any parasites, making it safe to eat raw or barely cooked. Regular canned tuna won't give you the same texture or flavor, and other tuna varieties aren't ideal for this preparation. If sushi-grade isn't available, you can use fresh yellowfin tuna from a reputable fishmonger, but always ask about their sourcing and handling practices.
How do I know when the tuna patties are cooked enough?
This is such an important question! For sushi-grade tuna, you want a beautifully seared crust on the outside while keeping the center rare to medium-rare. I cook mine 3-4 minutes per side over medium-high heat, which creates that crispy exterior while maintaining the tender, buttery center. If you prefer your tuna more cooked, increase the cooking time to 4-5 minutes per side, but be careful not to overcook it, as tuna becomes dry and tough when well-done. A meat thermometer should read about 110-115°F for rare, 120-125°F for medium-rare.
What can I substitute for sriracha if I don't have it?
Great question! I love experimenting with different heat sources. You can use sambal oelek (Indonesian chili paste), gochujang (Korean red chili paste), or even regular hot sauce in a pinch. For a milder version, try using a touch of Dijon mustard mixed with honey and a dash of cayenne pepper. Each will give a slightly different flavor profile, but they'll all add that spicy kick that makes this burger so exciting. Start with less and adjust to your heat preference!
Can I make these burgers ahead of time?
You can prepare the tuna mixture up to 24 hours ahead and refrigerate it in an airtight container. You can also shape the patties several hours ahead and keep them chilled. However, I don't recommend cooking the tuna patties more than 15-20 minutes before serving, as they're best enjoyed immediately when the exterior is crispy and the inside is still warm. The assembled burgers should be eaten right away for the best experience. You can prep all your toppings ahead of time though, which saves so much time during final assembly!
Are these burgers gluten-free?
The tuna patties themselves can be made gluten-free by using gluten-free panko breadcrumbs instead of regular panko. However, the brioche buns contain gluten. To make the entire burger gluten-free, you'll need to use gluten-free buns or lettuce wraps as an alternative. I've made these with large butter lettuce or iceberg lettuce leaves as wraps, and honestly, it's a delicious variation that keeps things fresh and light while letting the tuna shine!

Hi, I'm Lisa!
I create simple, tested recipes from around the world that anyone can make at home.
Learn More →Reader Reviews
Based on 309 reviews