Quick & Easy
Easy Hasselback Potatoes - Crispy, Buttery & Perfectly Seasoned
What Makes Hasselback Potatoes So Special?
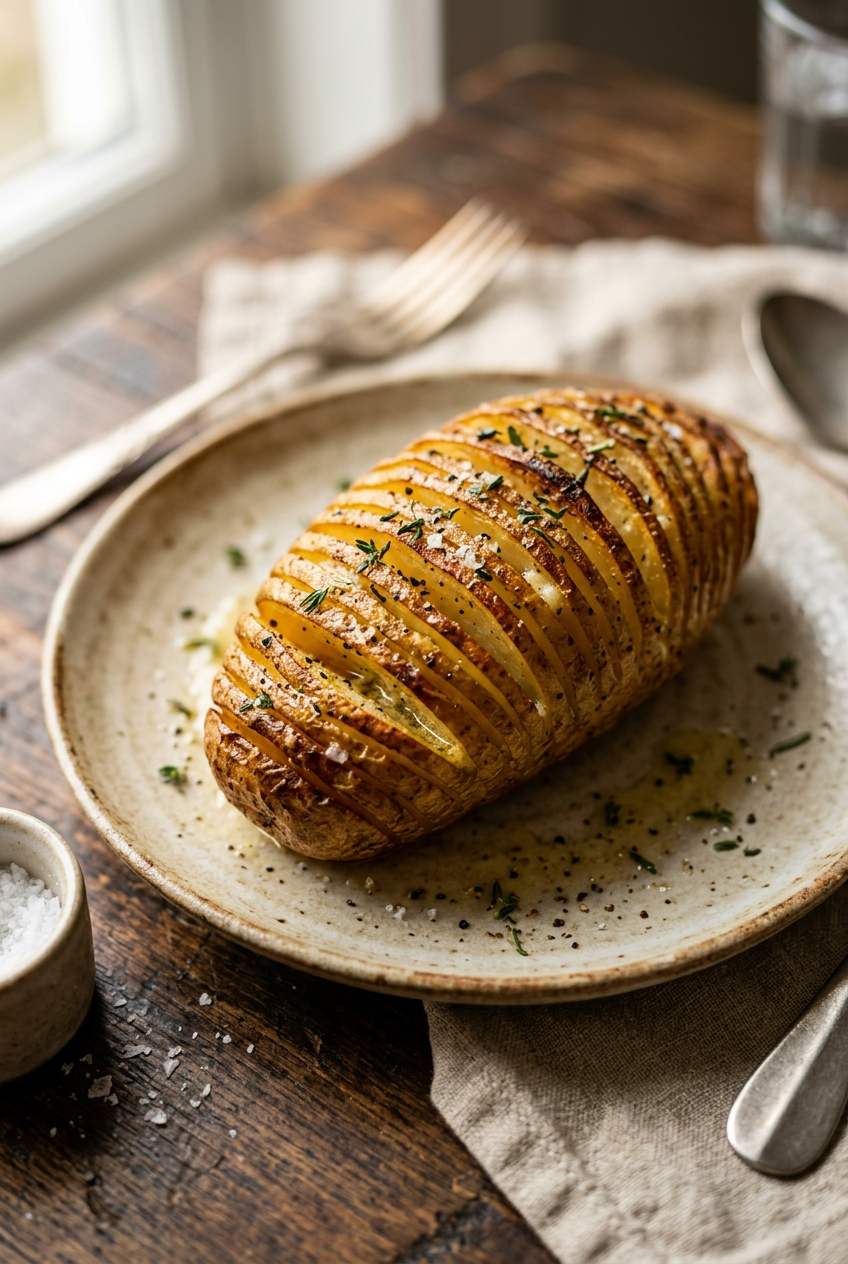
I’ll never forget the first time I encountered Hasselback potatoes at a cozy Swedish restaurant in Stockholm. The way they looked – like little golden accordions with crispy, fan-like edges – immediately caught my attention. But it was that first bite that truly won me over. The contrast between the incredibly crispy exterior and the fluffy, creamy interior was absolutely divine. Named after the Hasselbacken restaurant in Stockholm where they were first created in the 1940s, these potatoes have become a beloved side dish worldwide, and for good reason. They’re essentially the perfect marriage between a baked potato and roasted potato slices, giving you the best of both worlds in one stunning presentation.
The Secret to Perfect Easy Hasselback Potatoes
After making these countless times, I’ve discovered that the key to truly exceptional Hasselback potatoes lies in three crucial elements: the right cutting technique, proper seasoning distribution, and optimal baking temperature. The cutting technique is perhaps the most intimidating part for beginners, but I promise it’s easier than it looks. Using wooden spoons or chopsticks as guides is a game-changer – it completely eliminates the fear of cutting too deep. The seasoning needs to get into every crevice, which is why I always use a combination of oil and melted butter. The oil helps achieve that golden crispiness, while the butter adds incredible flavor and helps the seasonings stick. Finally, baking at 425°F is the sweet spot that allows the interior to cook through while the edges get beautifully crispy without burning.
Choosing the Right Potatoes
Not all potatoes are created equal when it comes to making Hasselback potatoes, and I learned this the hard way during my early cooking experiments. Russet potatoes are absolutely the gold standard for this recipe. Their high starch content means they become incredibly fluffy on the inside while developing those coveted crispy edges. I typically look for medium to large russets that are relatively uniform in shape – this ensures even cooking and makes for a more attractive presentation. Yukon Gold potatoes are my second choice; they have a naturally buttery flavor and creamy texture that works beautifully, though they won’t get quite as crispy as russets. I strongly advise against using waxy potatoes like red potatoes or fingerlings, as they tend to stay dense and won’t achieve that perfect contrast of textures we’re after.
Mastering the Cutting Technique
The iconic look of Hasselback potatoes comes from their distinctive accordion-like cuts, and mastering this technique is easier than you might think. I always start with clean, dry potatoes – any moisture can make them slippery and harder to cut safely. Place your potato on a stable cutting board and position wooden spoons or chopsticks along both sides. These act as your safety guards, preventing the knife from cutting completely through the potato. Make your cuts about 1/8 inch apart, which creates the perfect balance between having enough slices to fan out beautifully and maintaining the potato’s structural integrity. I use a sharp chef’s knife and make confident, straight cuts, going about 3/4 of the way through each potato. Don’t worry if your first few attempts aren’t perfect – even slightly uneven cuts will still result in delicious potatoes!
Seasoning and Flavor Variations
While my base recipe uses classic herbs and spices, Hasselback potatoes are incredibly versatile and can be adapted to complement virtually any meal. My go-to seasoning blend of garlic powder, rosemary, and paprika creates a beautifully aromatic and flavorful potato that pairs well with everything from roasted chicken to grilled steak. However, I love experimenting with different flavor profiles depending on what I’m serving. For Mediterranean-inspired meals, I might use oregano, thyme, and a sprinkle of feta cheese added during the last few minutes of baking. When I’m making Mexican food, I’ll season with cumin, chili powder, and a squeeze of lime juice after baking. The key is to always use a combination of oil and melted butter as your base – this ensures the seasonings adhere properly and helps achieve that perfect golden color.
Troubleshooting Common Issues
Over the years, I’ve encountered and solved virtually every Hasselback potato problem you can imagine. If your potatoes aren’t fanning out properly, it usually means the cuts weren’t deep enough or the oven temperature is too low. The slices should naturally separate as the potato cooks and the moisture evaporates. If the edges are browning too quickly but the center isn’t cooked through, try covering them loosely with foil for part of the cooking time, then removing it for the final 15 minutes to crisp up. Uneven browning often indicates that your oven has hot spots – rotating the baking sheet halfway through cooking usually solves this issue. If your potatoes seem dry, don’t hesitate to brush them with additional oil or butter mixture during baking. Remember, these potatoes should be golden, crispy, and absolutely irresistible when done correctly.
Serving Suggestions and Pairings
Hasselback potatoes are incredibly versatile and can elevate almost any meal from ordinary to extraordinary. I love serving them alongside roasted meats – they’re particularly stunning with herb-crusted lamb, roasted chicken, or a perfectly grilled steak. The crispy edges and creamy interior make them an excellent alternative to traditional mashed or roasted potatoes. For a lighter meal, I sometimes turn them into a main course by topping them with sour cream, chives, bacon bits, and cheese – essentially creating a deconstructed loaded baked potato. They’re also fantastic for holiday meals, as they look elegant enough for special occasions but are simple enough that they won’t stress you out in the kitchen. I always make sure to have some fresh herbs on hand for garnishing – chives, parsley, or even fresh rosemary sprigs make them look restaurant-worthy.
Ingredients
Main Ingredients
For Serving
Instructions
Prepare the Potatoes
Preheat your oven to 425°F (220°C). Wash and scrub the potatoes thoroughly, leaving the skin on. Pat them completely dry with paper towels. Place each potato on a cutting board and make cuts about 1/8 inch (3mm) apart, slicing about 3/4 of the way through the potato. To prevent cutting all the way through, place wooden spoons or chopsticks on either side of the potato as a guide.
Season the Potatoes
Place the sliced potatoes on a large baking sheet lined with parchment paper. In a small bowl, mix together the olive oil, melted butter, salt, pepper, garlic powder, rosemary, and paprika. Brush this mixture generously over each potato, making sure to get the seasoning between the slices. Use your fingers to gently fan out the slices slightly to help the seasoning penetrate.
Initial Baking
Bake the potatoes for 30 minutes. The edges should start to look golden and the slices should begin to fan out naturally. Remove from the oven and brush with any remaining oil mixture, adding more seasoning if desired.
Continue Baking for Crispiness
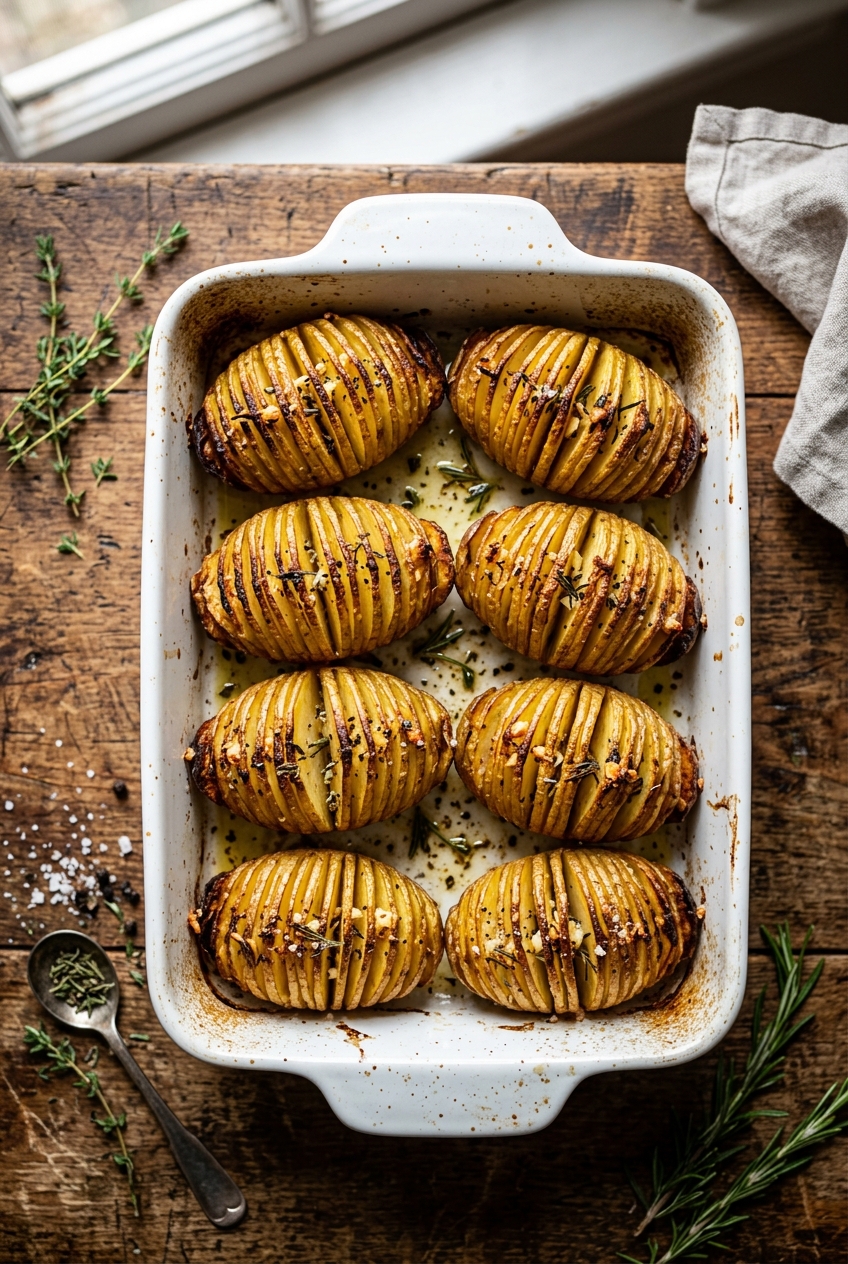
Return the potatoes to the oven and bake for an additional 15-20 minutes, or until the edges are golden brown and crispy, and a fork easily pierces through the center. The slices should be beautifully fanned out and the tops should be gorgeously golden.
Finish and Serve
Remove from the oven and let cool for 5 minutes. Sprinkle with fresh chives and grated Parmesan cheese if using. Serve immediately while hot and crispy, with a dollop of sour cream on the side if desired. These make the perfect side dish for any meal!
Nutrition Information
Per serving (serves 4). Values are approximate.
| Calories | 285 calories |
| Total Fat | 12g |
| Saturated Fat | 4g |
| Carbohydrates | 42g |
| Sugar | 3g |
| Protein | 6g |
| Sodium | 590mg |
| Fiber | 4g |
* Percent Daily Values are based on a 2,000 calorie diet. Your daily values may be higher or lower depending on your calorie needs. Nutritional information is an estimate and may vary.
Never Miss a Recipe
Join 5,000+ home cooks and get new recipes straight to your inbox.
Frequently Asked Questions
What's the best way to cut Hasselback potatoes without cutting all the way through?
Place wooden spoons or chopsticks on either side of the potato as a cutting guide. This prevents your knife from going too deep and ensures you maintain the potato's structure while creating those beautiful accordion-like slices.
Can I make Hasselback potatoes ahead of time?
You can prep the potatoes by washing, cutting, and seasoning them up to 4 hours ahead. Cover and refrigerate until ready to bake. You may need to add 5-10 extra minutes to the cooking time if baking straight from the fridge.
What type of potatoes work best for this recipe?
Russet potatoes are ideal because they're starchy and become fluffy inside while crisping beautifully on the outside. Yukon Gold potatoes also work well and have a creamier texture. Avoid waxy potatoes like red potatoes as they won't achieve the same crispy results.
How do I know when my Hasselback potatoes are done?
The potatoes are ready when the edges are golden brown and crispy, the slices have fanned out naturally, and a fork easily pierces through the thickest part. The total cooking time is usually 45-50 minutes at 425°F.
Can I add different seasonings to my Hasselback potatoes?
Absolutely! Try herbs like thyme, oregano, or sage. Spices like smoked paprika, onion powder, or even a sprinkle of ranch seasoning work wonderfully. You can also add grated cheese during the last 10 minutes of baking for extra flavor.

Hi, I'm Lisa!
I create simple, tested recipes from around the world that anyone can make at home.
Learn More →Reader Reviews
Based on 234 reviews