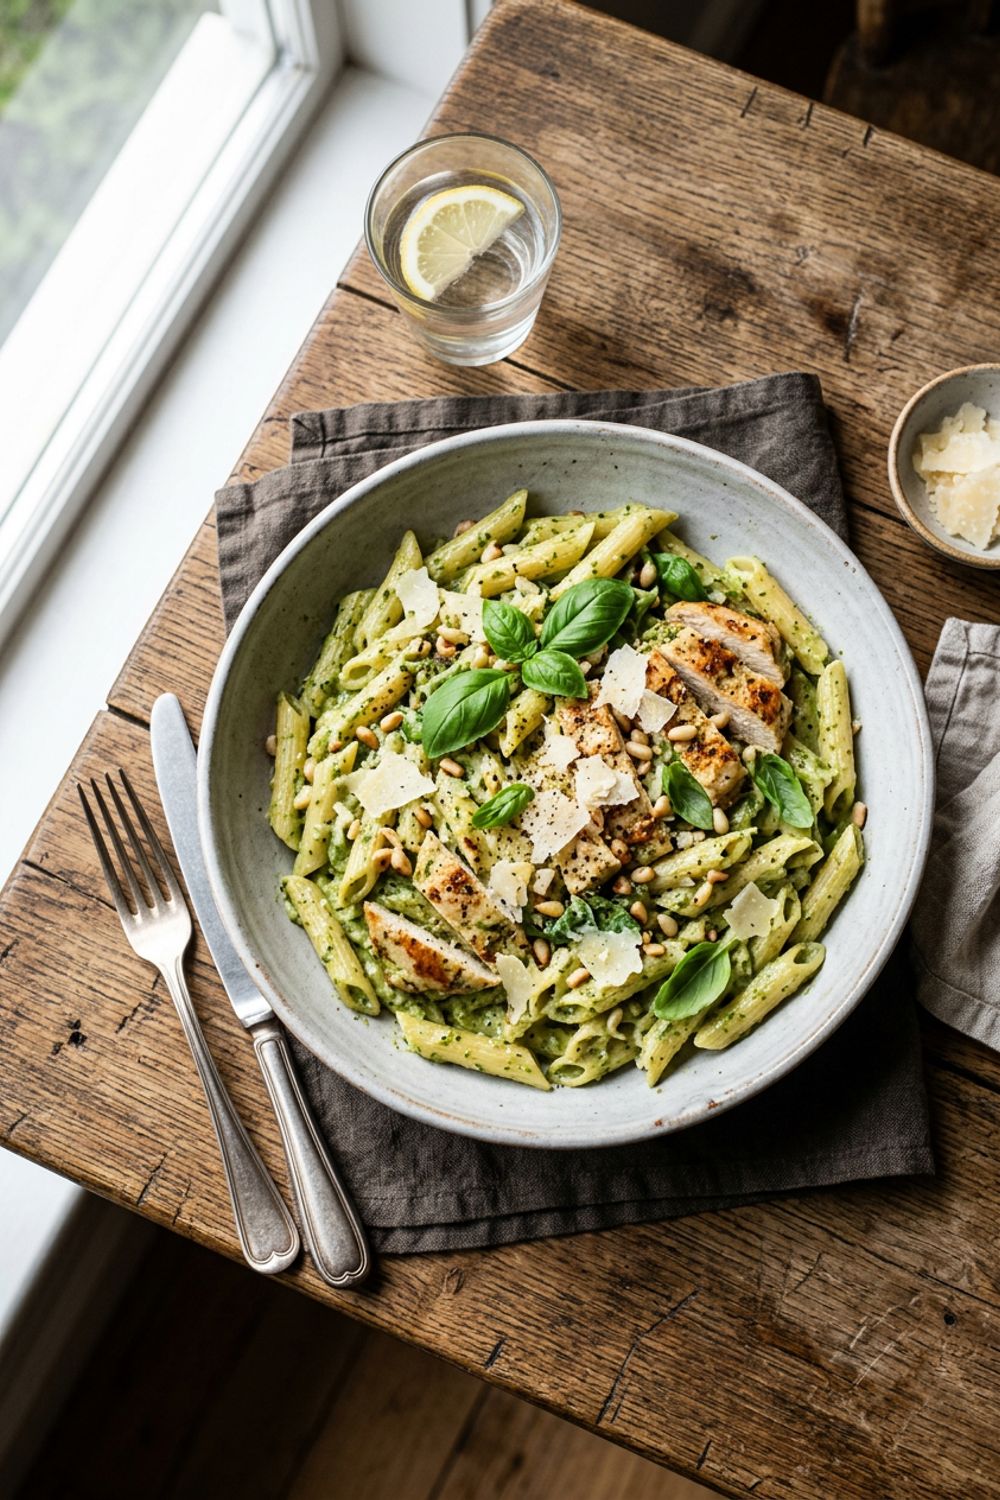
Pasta & Noodles
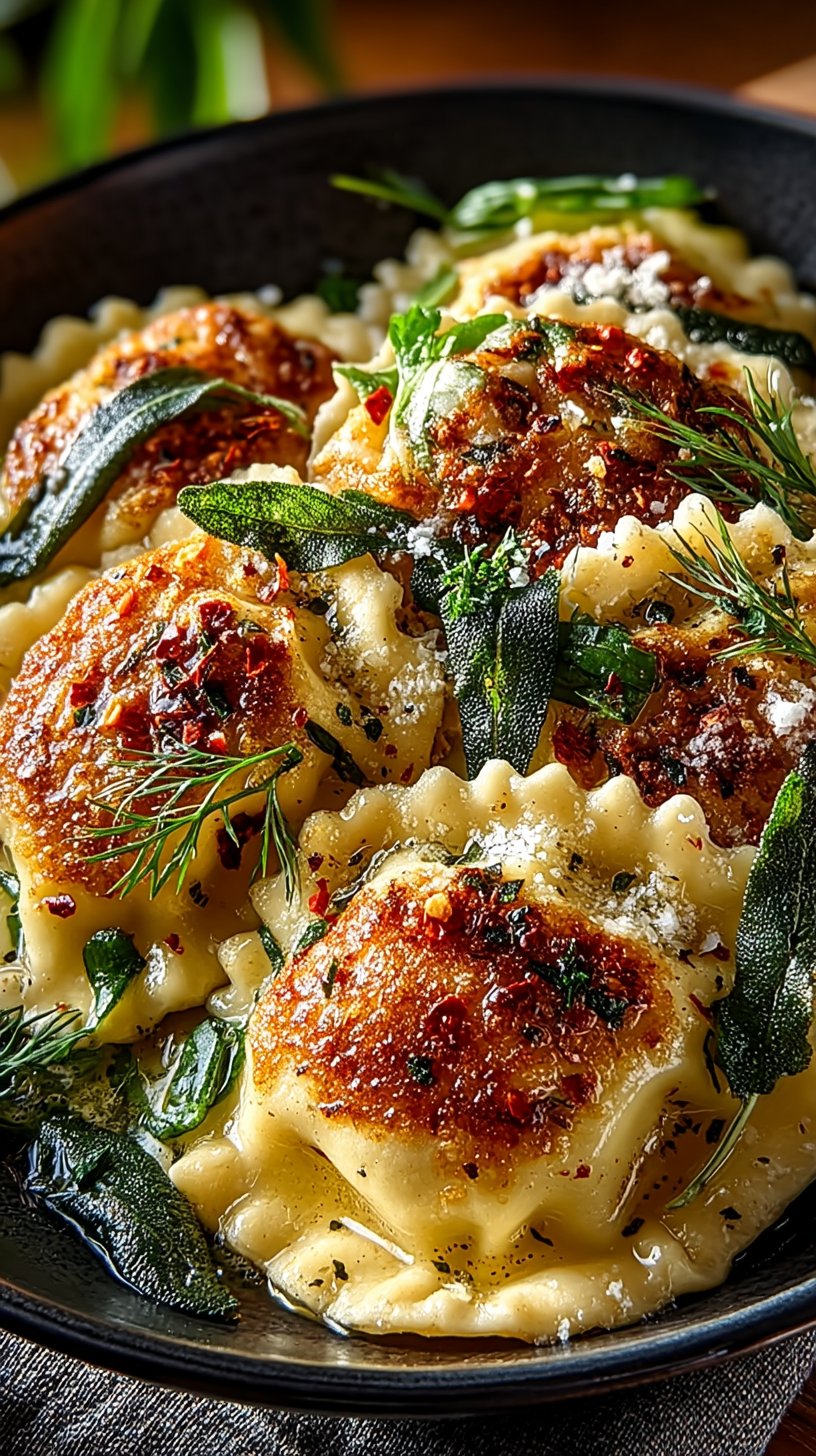
Homemade Lobster Ravioli with Butter Sage Sauce
Learn how to make elegant lobster ravioli from scratch. Delicate pasta pockets filled with creamy lobster, topped with brown butter sage sauce.

Why Lobster Ravioli Is Worth The Effort
I still remember the first time I had authentic lobster ravioli at a tiny trattoria in Boston. The moment that delicate pasta parcel burst on my tongue, releasing that sweet, buttery lobster filling, I was absolutely smitten. From that moment on, I knew I had to master making it at home. What captivates me most about this dish is how it represents the beautiful intersection of Italian pasta tradition and premium American seafood. Making it yourself isn’t just about the end result—it’s about the entire sensory journey. You’ll experience the meditative rhythm of kneading dough, the aromatic transformation of butter as it browns, and the satisfaction of hand-shaping each ravioli with care. This is food that says ‘I love you’ without speaking a word, whether you’re cooking for someone special or celebrating a milestone. The elegance of lobster ravioli comes from its simplicity—just a few high-quality ingredients treated with respect and technique. It’s proof that you don’t need complicated recipes to create something extraordinary.
Sourcing Your Lobster: A Guide
The quality of your lobster meat directly impacts the success of this dish, so let’s talk sourcing. I always recommend buying from a reputable seafood counter where you can see what you’re getting. Fresh lobster meat is your gold standard—it’s sweet, firm, and has that beautiful color. If you’re buying pre-cooked lobster tails, look for meat that’s firm and translucent, not mushy or overly dark. The best time to find reasonably priced lobster is late summer through fall when the season peaks. I sometimes buy whole lobsters, cook them myself, and extract the meat—it’s more economical and honestly, kind of fun. When buying frozen lobster meat, thaw it slowly in the refrigerator overnight, then pat it completely dry. Moisture is the enemy when making filling, as it can make your ravioli soggy. If you’re using canned lobster (which I do occasionally), choose a reputable brand and drain it thoroughly, pressing gently with paper towels to remove excess liquid. Some specialty stores and online retailers ship incredibly fresh lobster meat if you don’t have access to quality options locally—it’s an investment in your special dinner.
Mastering Pasta Dough: Tips From Experience
Creating perfect pasta dough is both science and art, and I’ve learned so much through trial and error. The most important thing I discovered is that humidity in your kitchen affects everything—on humid days, you’ll need less water; on dry days, you might need more. This is why I always recommend adding water gradually rather than all at once. The texture you’re aiming for is smooth, supple, and slightly elastic, similar to a baby’s skin or an earlobe (sounds funny, but it’s actually the perfect comparison). Room temperature is ideal for kneading because cold dough is stubborn, while warm dough becomes sticky. If your dough tears easily when rolling, it needs more kneading time or a slightly longer rest. If it tears while cooking, you might have added too much water. Resting the dough truly matters—those 30 minutes allow the gluten to relax and the flour to fully hydrate, making the dough infinitely easier to work with. I sometimes see people skip this step, and it always results in frustration. Many Italian nonnas taught me that you can make pasta dough with just about any flour, but quality matters. All-purpose flour gives a good balance, while tipo 00 flour (doppio zero) creates a more delicate, tender pasta that’s absolutely divine for filled ravioli.
The Art Of Filling And Shaping
This step determines whether your ravioli stays sealed or opens during cooking, releasing that precious filling into the water. The secret is adequate sealing—and I mean really pressing those edges firmly. I use the tines of a fork to create both the seal and that beautiful texture. When filling, less is actually more. Too much filling tempts you to overfill, which inevitably bursts during cooking. I measure my filling portion carefully—about 1 teaspoon (5ml) per ravioli—which is enough to be generous without being excessive. The edges of your pasta sheet need to be slightly moist to seal properly, but not dripping wet. I lightly brush the edges with water using my finger. If your pasta sheet starts drying out as you work, cover the unused portion with a clean kitchen towel. Work quickly but never frantically—rushed hands make mistakes. Some people prefer round ravioli, others love square, and some go for the pretty half-moon shape (which I adore). Whatever shape you choose, consistency matters because it affects even cooking. I’ve found that hand-shaping is meditative and actually quite easy once you get the rhythm. If you want perfectly uniform ravioli, a ravioli press is a worthwhile investment, but it’s absolutely not necessary for delicious results.
Making Brown Butter: The Magic Moment
Brown butter—or beurre noisette as the French beautifully call it—transforms ordinary butter into liquid gold. This sauce elevates humble pasta to restaurant-quality elegance. The process is simple but requires attention. Start with cold, unsalted butter cut into pieces, which allows even melting. Place it in a light-colored saucepan so you can see the color change. Heat it over medium, and it will initially foam—this is just water evaporating. Keep stirring gently, and you’ll watch the milk solids slowly sink to the bottom and turn from white to golden to amber brown. This is where the magic happens. That gorgeous nutty aroma is your cue that it’s nearing perfection. The entire process takes about 4-5 minutes, and you want to stop just before it goes from brown to burnt—there’s a narrow window of perfection here. Remove it from heat immediately once it reaches that beautiful caramel color. Adding sage leaves at this moment is where the flavor deepens tremendously. Sage and browned butter are made for each other. A squeeze of lemon juice at the end brightens everything, preventing the sauce from becoming one-dimensional. Many people are nervous about making brown butter, but honestly, once you see it happen once, you’ll make it all the time. It’s foolproof if you pay attention.
Cooking Ravioli: Timing Is Everything
There’s a magical moment when ravioli finish cooking, and if you miss it by even 30 seconds, you risk the filling being too hot (bursting open) or the pasta becoming mushy. This is why I always remain standing right at the pot, not wandering off to check my phone. First, your water must be at a rolling boil—not a gentle simmer. Salt it generously; your ravioli should taste like seasoned pasta, not bland. Gently lower your ravioli into the water. They’ll sink immediately, which is normal. Don’t stir them around frantically; just give the water one gentle stir and let them cook. Within 2-4 minutes (depending on thickness of your pasta), they’ll float to the surface. This is a beautiful moment—it means they’re becoming less dense as the filling cooks. Once they float, give them another 2-3 minutes of cooking time. The overall cooking time for fresh ravioli is usually 4-7 minutes total. Frozen ravioli take about 6-9 minutes. You’ll know they’re done when the pasta tastes tender but still has slight firmness, never mushy. I always test one slightly before removing them all. Remove them with a slotted spoon gently—they’re tender and easily damaged. Never, ever drain them in a colander; you’ll either lose them or break them. The slotted spoon is your ravioli’s best friend.
Ingredients
For the Pasta Dough
For the Lobster Filling
For the Brown Butter Sage Sauce
Instructions
Create Your Pasta Dough
I always start by creating a little flour mountain on my clean countertop—it's like edible architecture! Mound 2 cups (250g) of all-purpose flour and make a well in the center, like a volcano crater. Crack 3 large eggs directly into this well, add 1 tablespoon (15ml) of olive oil and 1/2 teaspoon (3g) of salt. Using a fork, gently beat the eggs together, then gradually incorporate the flour from the walls of your well, working slowly to prevent any dramatic egg overflow. Once the mixture becomes shaggy, use your hands to knead everything together into a rough ball. If it feels too dry, add water one tablespoon at a time. The dough should feel smooth and elastic after about 8-10 minutes of kneading. Wrap it in plastic wrap and let it rest at room temperature for at least 30 minutes—this relaxation time makes rolling so much easier.
Prepare the Luxurious Lobster Filling
While your dough rests, let's create the filling that makes these ravioli absolutely spectacular. In a medium bowl, combine 8 oz (225g) of finely chopped cooked lobster meat with 1/2 cup (120g) of whole milk ricotta cheese, 2 tablespoons (20g) of freshly grated Parmigiano-Reggiano, and 1 tablespoon (15g) of mascarpone cheese. Add 1 egg yolk—this acts as a binder and creates that silky texture. Fold in 2 tablespoons (8g) of fresh parsley, 1 tablespoon (3g) of fresh chives, and the zest from 1/2 lemon for brightness. Season with 1/4 teaspoon (1g) of white pepper and 1/4 teaspoon (1.5g) of sea salt. Taste it—you want this filling to be flavorful because it's the star. I like to chill mine for 15 minutes, which makes it easier to work with.
Roll and Cut Your Ravioli Sheets
This is where a pasta machine becomes your best friend, though a rolling pin works beautifully too. Divide your rested dough into 4 pieces and work with one at a time, keeping the others covered. If using a pasta machine, start at the thickest setting, running your dough through several times, folding it in half each pass, until it's smooth and supple. Then progressively move to thinner settings until you reach the second-thinnest setting—you want sheets thin enough to see your hand through them, but sturdy enough to hold the filling. Lay your pasta sheet on a lightly floured surface. Using a 3-inch (7.5cm) round cookie cutter or wine glass, cut circles from the sheet. Working quickly so the pasta doesn't dry out, place 1 teaspoon (about 5ml) of filling in the center of each circle, then fold into a half-moon shape, pressing the edges firmly to seal. For extra elegance, press the curved edge with the tines of a fork for that classic ravioli look.
Rest and Prepare for Cooking
Once you've filled and shaped all your ravioli, arrange them on a parchment-lined baking sheet, making sure they don't touch each other. They can stick together, which is tragic when you're about to cook them. I cover mine loosely with a clean kitchen towel and let them rest for about 15 minutes at room temperature. This short rest actually helps them hold together better during cooking. You can also refrigerate them for up to 4 hours, or even freeze them for up to 2 weeks—just add a few extra minutes to the cooking time if cooking from frozen.
Make Your Brown Butter Sage Sauce
While your ravioli are chilling, let's create that gorgeous brown butter sage sauce that makes these ravioli sing. In a large skillet, melt 6 tablespoons (85g) of unsalted butter over medium heat. This is my favorite part—watching butter transform from pale and foamy to deep golden and nutty. It takes about 4-5 minutes. Once it turns a beautiful caramel color and you can smell that wonderful nutty aroma, add 12 fresh sage leaves and 2 minced garlic cloves. Stir gently for about 1 minute until fragrant, being careful not to let the garlic burn. Remove from heat and add the juice of 1/2 lemon (about 1.5 tablespoons or 22ml), 1/4 teaspoon (1.5g) of sea salt, and a pinch of white pepper. Set aside and keep warm—you'll toss the cooked ravioli right into this liquid gold.
Cook Your Ravioli to Perfection
Bring a large pot of salted water to a rolling boil—I use about 1 tablespoon (18g) of salt per quart of water, as my Italian grandmother taught me. Carefully slip your ravioli into the water, working in batches if needed so they don't overcrowd the pot. They'll initially sink, then rise to the surface as they cook. Once they float, give them another 2-3 minutes of cooking time. You want them tender but with a slight firmness to the pasta itself—al dente, as we say. Gently remove them with a slotted spoon and place them directly into your warm brown butter sage sauce. Work delicately here—these are tender parcels of deliciousness.
Plate and Serve with Elegance
Divide your lobster ravioli among four serving bowls or plates, spooning that magnificent brown butter sauce over each portion. Top with a sprinkle of additional Parmigiano-Reggiano, a pinch of fleur de sel, and some micro greens or fresh herb sprigs if you have them. A tiny squeeze of fresh lemon juice right before serving adds that perfect finishing brightness. Serve immediately while everything is warm and the butter sauce is still luscious. This is truly special-occasion food that celebrates the incredible sweetness of lobster meat.
Nutrition Information
Per serving (serves 4). Values are approximate.
| Calories | 485 calories |
| Total Fat | 28g |
| Saturated Fat | 16g |
| Carbohydrates | 38g |
| Sugar | 2g |
| Protein | 32g |
| Sodium | 680mg |
| Fiber | 1g |
* Percent Daily Values are based on a 2,000 calorie diet. Your daily values may be higher or lower depending on your calorie needs. Nutritional information is an estimate and may vary.
Never Miss a Recipe
Join 5,000+ home cooks and get new recipes straight to your inbox.
Frequently Asked Questions
Can I make lobster ravioli without a pasta machine?
Absolutely! A good rolling pin works beautifully. The key is patience and even pressure. Roll your dough between two sheets of parchment paper to prevent sticking, and try to achieve a thickness where you can just barely see your hand through it. It takes a bit more elbow grease, but the result is just as delicious. I've made countless batches both ways, and honestly, the pasta machine is more about convenience than quality.
What if I can't find fresh lobster meat?
You have options! High-quality frozen lobster meat works wonderfully—just thaw it completely and pat it dry before chopping. You can also use lobster tail meat from the seafood counter. In a pinch, I've successfully made these with premium canned lobster, though it's slightly less sweet. Some people even use a combination of lobster and crab, which creates an equally elegant filling. The key is using the freshest-tasting option available to you.
How far in advance can I prepare lobster ravioli?
I love this question because it makes dinner entertaining so much easier! You can prepare the filling and dough separately up to 1 day ahead—keep them covered and refrigerated. Once shaped, raw ravioli can be refrigerated for up to 4 hours or frozen for up to 2 weeks. If freezing, arrange them on a baking sheet first to freeze individually, then transfer to a freezer bag. Cook frozen ravioli straight from the freezer without thawing—just add 2-3 extra minutes to the cooking time. The brown butter sauce is best made just before serving, though you can prepare the components earlier.
What wines pair well with lobster ravioli?
The brown butter sage sauce absolutely loves crisp white wines. I typically serve this with Sauvignon Blanc, Pinot Grigio, or a dry Albariño. The acidity cuts beautifully through the richness of the butter and the sweetness of the lobster. If you prefer something fuller, an unoaked Chardonnay is divine. For something special, a Chablis or even a light rosé works wonderfully. Avoid heavily oaked wines as they can overpower the delicate lobster flavor.
Can I prepare a different sauce for these ravioli?
Definitely! While I adore brown butter sage, these ravioli are incredibly versatile. A light lemon cream sauce is stunning, or try a simple tomato bisque for a more luxurious feel. Some people make a white wine butter sauce with white wine and shallots, or even a champagne cream sauce for extra celebration. You could also do a classic marinara, though I find lighter, butter-based sauces let the beautiful lobster flavor shine through more clearly. The brown butter sage is my go-to because it's elegant without overshadowing the star ingredient.

Hi, I'm Lisa!
I create simple, tested recipes from around the world that anyone can make at home.
Learn More →Reader Reviews
Based on 282 reviews